If you’re just getting started learning how to bake, you’ll need to know the basics of cake pans, plus some tips on how to get the best results for every layer you bake.
This article includes affiliate links that will pay a commission if they’re used to purchase something. As an Amazon associate, I earn from qualifying purchases.

General cake pan tips.
1. Size matters.
Cake pans are usually measured across the bottom of the pan, even though some are slightly flared at the top. If the recipe calls for an 8″ pan, use a pan that measures 8″ across the bottom of the pan.
If you use a different size it will affect the baking time, and the cake won’t be as tall as it should be, obviously.
2. Prep pans correctly.
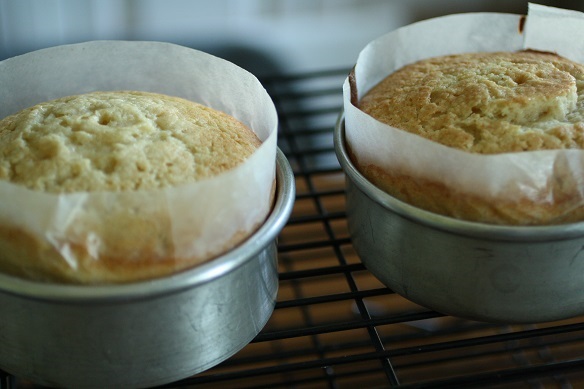
To make sure that the cake comes out of the pan, line the bottom with waxed paper, parchment paper for baking, or a silicone pan liner.
After cooling the cake in the pan for at least 10 minutes, run a knife around the sides of the pan, then turn the cake out.
When you turn the pan over, the liner will release the cake and it will come out without any problem.
3. Professional isn’t the solution.
You don’t need to buy super-expensive pans, the regular aluminum ones conduct the heat evenly, cool off quickly, and will give good results.
I’ve never seen a bakery that used the fancy “professional” pans you get in department stores.
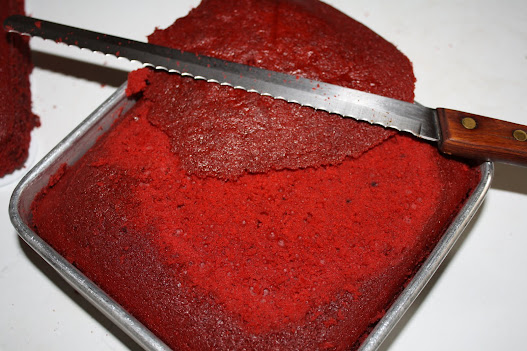
4. Level before de-panning.
Use the top of the pan to level off the cake before you remove it. Take a long bread knife and cut the domed top of the cake off, using the top edge of the pan as the guide.
It will give you a level surface to work with when putting the cake layers together.
Just be careful not to scrape the pan itself with the knife, or you might add some metal shavings to the cake, which is generally not something you want to do.
If you didn’t do that, you can use a cake leveler to do the job. The best one is the Agway, but there are other options that will work.
For an article with other ways to level a cake, and one thing to avoid doing, click here.
5. Trim before icing (sometimes.)
When using square pans, they rarely give you perfectly straight edges, so you can trim the sides after the cake has been filled and before crumb-coating.
You can also trim the edges off of round cakes to make them easier to ice if there are a lot of excess crumbs on the sides.
6. Be careful with pans full of batter!
When you are moving pans of batter around, make sure to keep a tight grip on them, or they might randomly flip out of your hand and slop batter all over the floor. Not that this happened to me last week, or anything…

7. Cool and store cake layers in the pans.
Cool cakes off in the pans to prevent the layers from breaking. If you try to turn the layers out too quickly the structure won’t be cooled off and the cake can fall apart.
Put them on cooling racks so that air can circulate under the pans to cool the bottoms off faster.
You can put the pans in the freezer for a little while to hurry the process up, but this is going to heat your freezer up so don’t do it unless it’s an emergency!
When they’re totally cooled off you can wrap the pan with plastic wrap until you need to de-pan them to decorate.
8. Learn to love cake collars.
Use cake collars in your pans to prevent batter overflow, and to let you level the cakes easier since the collars will let you bake the layers a little higher than the edge of the pan. I wrote another article about what those are and how to make them, click here for that: Cake Collars
9. Metal is the best.
Non-metal cake pans (ceramic, silicone, glass) don’t conduct heat the same way that metal does, so you’ll need to adjust baking times.
10. Piping nails help large cakes bake evenly.
If you have a pan that’s larger than 10″, you might need to use a baking core or an upside-down piping nail in the pan to help the center of the batter heat up evenly.
If the sides of the pan heat up and the batter bakes on the outside faster than the inside, the baking time can be affected and the outside can dry out.
Putting an upside-down flower piping nail in the center of the pan, or adding two or three for pans that are very large, adds a source of hot metal to the center of the batter and helps the whole layer bake evenly.
I used to use 1 flower nail in a 10″ pan, 2 in a 12″ pan, and 3 in larger pans. That was enough to add some heat to the center of the pan, so the layers all baked evenly throughout the pan.