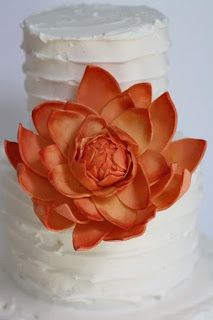
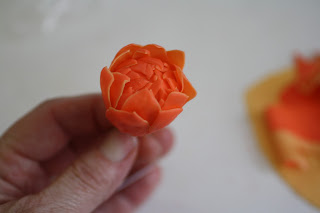
I’m making a large dahlia-type flower for an upcoming event and I wanted to make it multiple shades of orange.
By doing that It would give it a depth that a single shade wouldn’t have had.
I still plan to dust the tips when I’m done, but here’s the process of making the petals.
This article includes affiliate links that will pay a commission if they’re used to purchase something. As an Amazon associate, I earn from qualifying purchases.
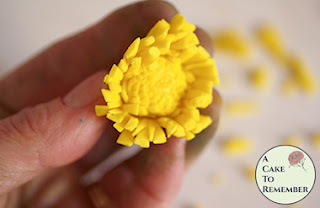
Make the center.
Start with the two shades of gumpaste…I used the darkest and lightest here.
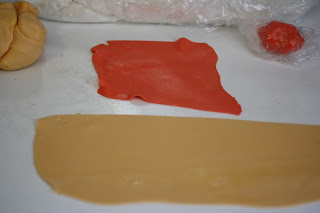
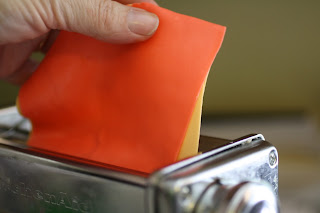
I rolled them out through a pasta roller so that they were both very thin, then overlapped them and cut them to be about the same size.
I ran them through the paste roller again to stick them together.
Using a 1″ styrofoam ball on a wire for the center…
…I cut out three daisy shapes using a 2″ daisy cutter.
I wet the lighter side of the flower shapes and stuck them to the ball, overlapping the petals to cover it entirely.
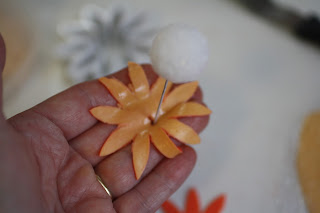
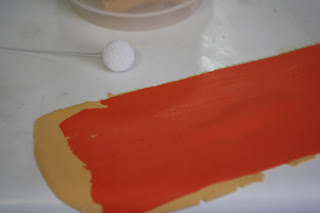
The double color won’t be super obvious at this point, but it shows a little.
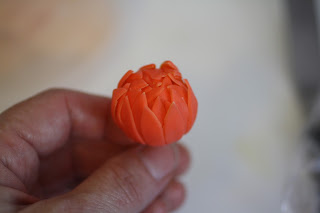
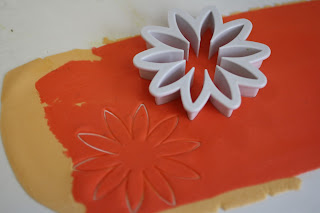
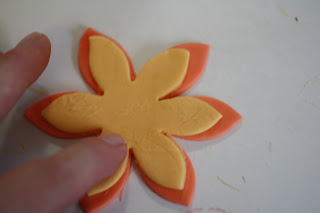
Using the same piece of gumpaste, I cut out two larger daisies.
Thin the edges to make the darker color more visible through the lighter color.
Wet the flower shapes and attach them to the center, overlapping the petals and pulling them away from the center at the tops so that the lighter color is a little more visible.
When you run out of the multicolored gumpaste to cut, knead it all together and use it as the darker color, or add a little more of the darker color to it.
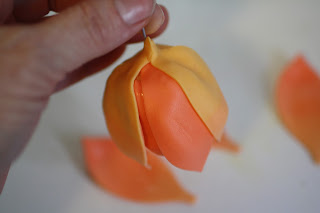
Add more petals to the center.
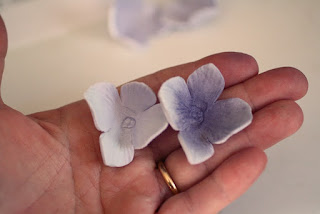
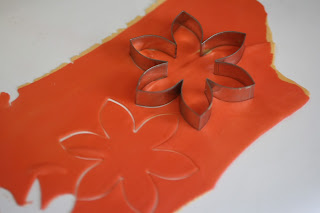
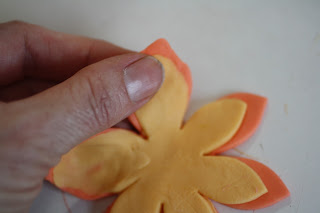
Roll out the gumpaste individually and cut out one of the lighter color using the same size daisy cutter and a larger one of the darker color.
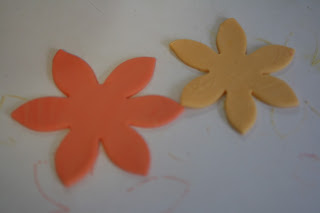
Put the lighter color on top of the darker one. The darker one should extend past the edges of the lighter one.
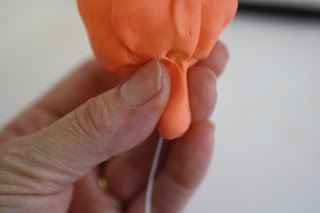
Pinch the edges of the petals to stick them together.
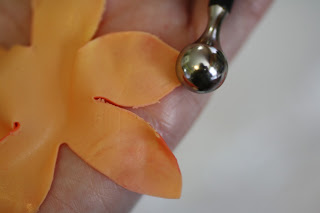
Using a ball tool, cup the inside of the petals.
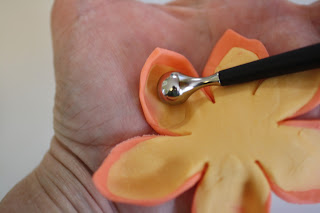
Attach to the center.
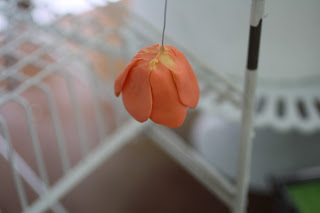
Pinch the gumpaste at the base of the wire to decrease the bulk there.
Hang the center upside down to dry.
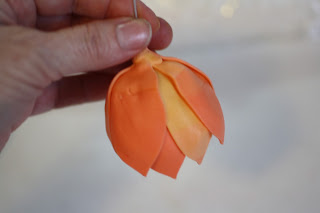
Make the larger petals.
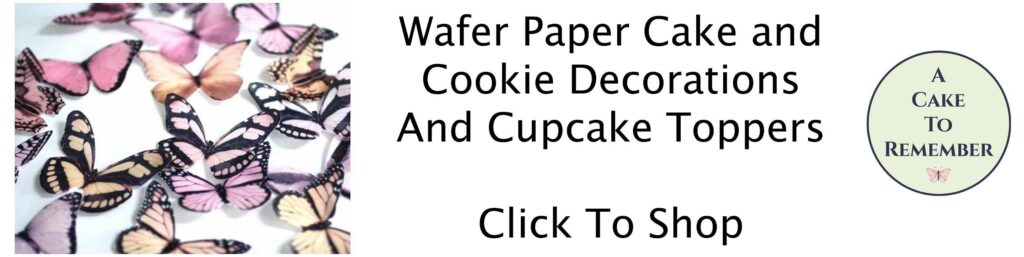
Here’s the next step, which is to make an ombre block of gumpaste to use for the larger petals.
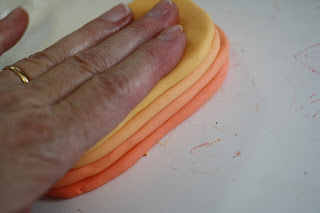
First, make four shades of the gumpaste by combining the lighter and darker colors in different amounts to make the two middle shades. Shape the gumpaste into similar-sized flat discs.

Using water in between the discs, attach the colors together and press firmly to attach. Let them sit for a while to give them a chance to adhere.
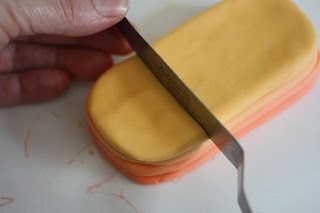
Cut a piece off of the block. Turn it sideways and flatten it out so that you can see each color.
Flatten it out with your hand so that you can run it through a pasta machine or roll it out by hand.
You want to be able to see each color, don’t flatten it out so that the light or dark side hides the other colors.
This will make more sense when you start doing it. 🙂
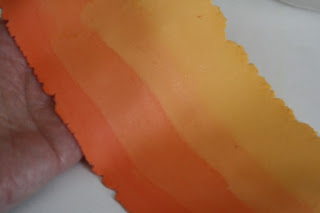
Run the multicolored strip through the pasta machine so that the dark side is on one edge and the light side is on one edge.
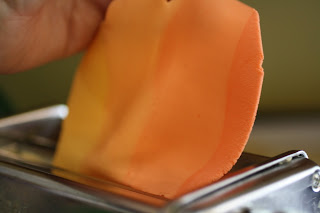
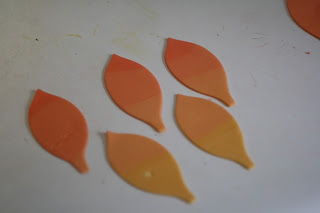
Now you’ll have an ombre strip that you can cut out various petals. Make sure that the darker edge is where you want it to be on the petal and not on the opposite end.
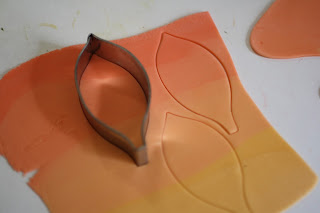
They don’t all have to be cut out from the same place on the gumpaste sheet.
The color variation should be subtle so if it’s slightly different on each petal that’s fine.
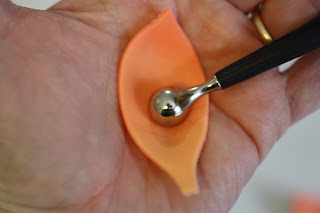
Cup the petals with the ball tool by rubbing in the center of each petal.
Attach them to the flower center using some water or gum glue. I did two rows of five petals each.
Turn the center right-side up and thread the wire through a piece of tinfoil to support the larger petals as it dries.
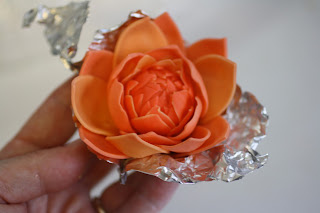
Arrange the tinfoil and the petals until they’re in the position that you want them to be in, and let it dry.
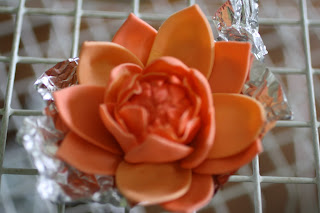
Make the wired outer petals.
The next steps include the outer petals, which are wired.
Use the block of colored gumpaste that you made in step 2 and cut off another piece. Make the wired petals.
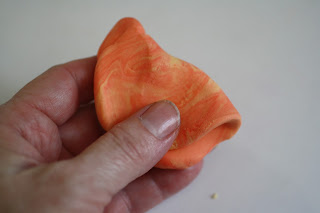
Flatten it out and roll it out using the pasta roller.
It might end up having very distinct stripes where the colors separate. To fix that, you can re-roll it.
Fold the piece over onto itself once, keeping the stripes on the outside.
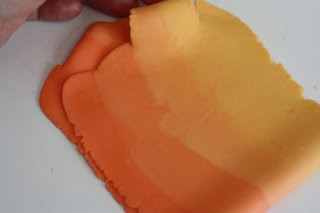
Out this piece through the pasta roller once, then fold again and put it through again. Repeat until you get a smooth transition between colors.
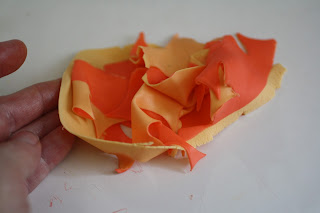
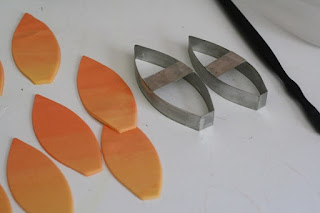
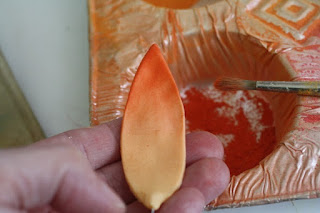
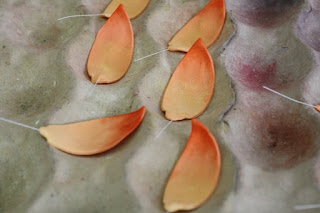
Cut out 5 or 6 petals from this piece using lily petal cutters and wire the petals. I used 30 gauge wire.
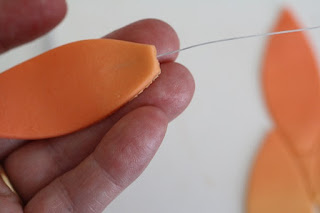
Pinch the gumpaste at the base of the petal so that it’s securely attached on the wire.
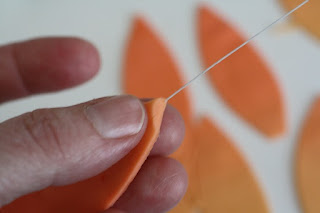
Cup the petals slightly using a ball tool, then dry on a pulp tray or flower former.
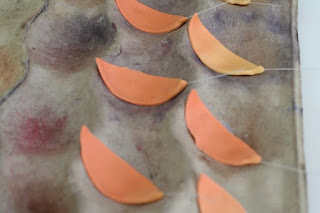
Cut out 5 or 6 slightly larger petals from the gumpaste and wire those the same way.
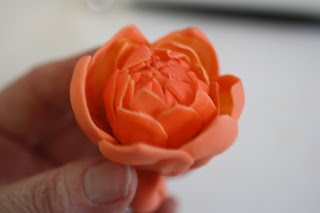
When those dry, brush the tips with some darker petal dust if you want to emphasize the ombre color change.
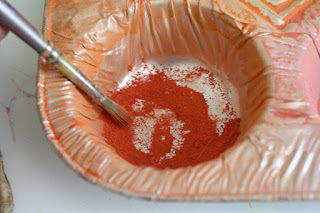
Dust the tips of the outer petals on the flower center.
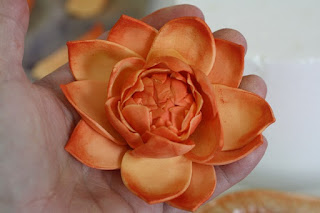
Wire the petals onto the center using floral tape, and here’s the final flower: