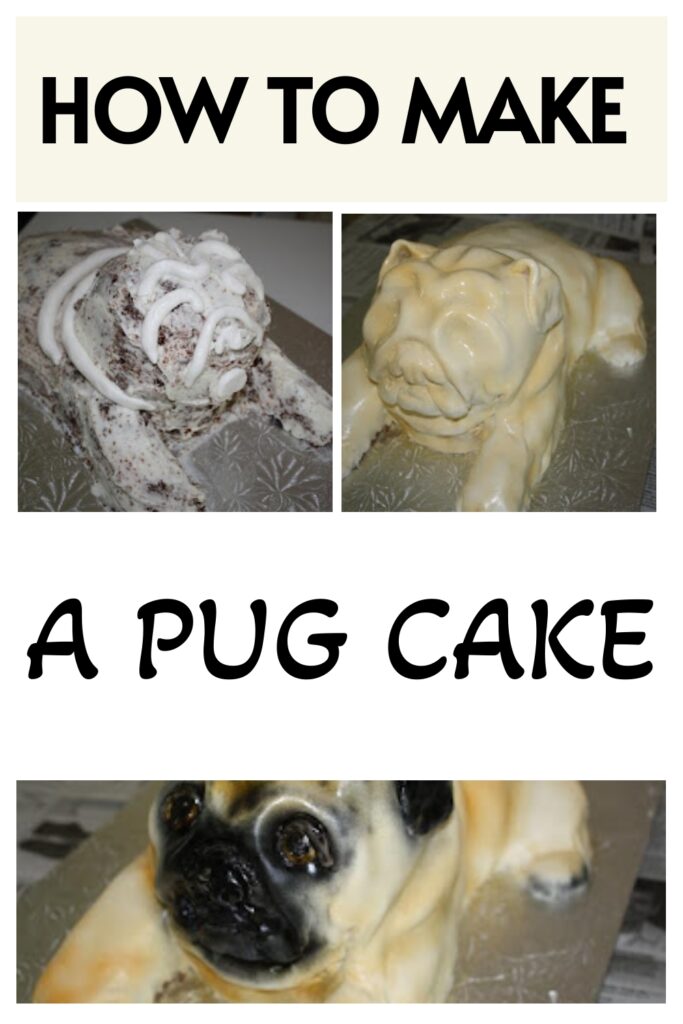
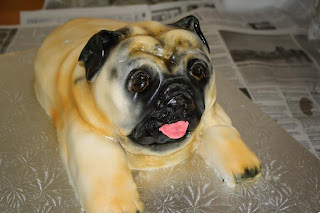
I did a pug groom’s cake last week, so I thought I’d post some basic photos of the steps I took to make it.
This article includes affiliate links that will pay a commission if they’re used to purchase something. As an Amazon associate, I earn from qualifying purchases.
Carve the cake shape.
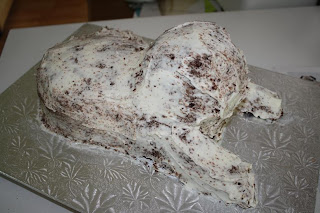
The first thing you need to do is cut the cakes and get the basic dog shape.
It’s helpful to go online to get pictures of the specific breed in the position you want it to be in, since every dog sits and lies down in a different way.
For this one I used a sheet plus a couple of small rounds to stack for the head, then I carved them into shape and crumb-coated the whole thing.
There are no dowels or supports needed for this one since it wasn’t too tall, and none of the cakes are overhanging ones underneath them.
This is more of a block carving technique that doesn’t have a lot of risk of falling over.
Add fondant for wrinkles.
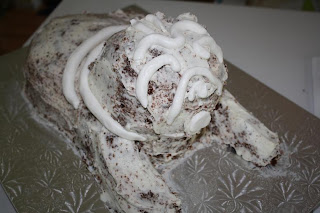
After the crumb coat is on, put some fondant rolls on the areas where there needs to be details that come from depth.
Pugs obviously have a lot of wrinkles, so I put small rolls of fondant on the areas where the skin would be protruding on the dog.
Don’t make the rolls too big, because the fondant is going to cover it, and whatever is under it will be increased in size once the whole thing is covered.
Cover with fondant.
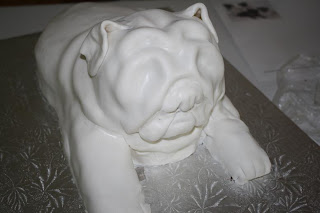
Next, cover the cake and press the fondant into the shapes that you want, using the rolls underneath as a guide to getting the right features.
Color the cake.
I added fondant ears at this point, but not the eyes yet.
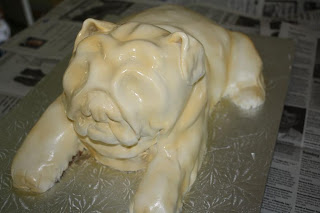
Now airbrush the dog the color that you want.
This pug was a fawn one, so I used a little ivory food coloring thinned out in vodka.
If I was making a black pug I’d use black fondant to cover the cake instead of airbrushing the color on, because that would be a heinous mess.
If you don’t have an airbrush you can do this with a good-quality paintbrush (make sure that the hairs don’t fall out, don’t use a cheap brush!) or a foam paintbrush and food coloring.
Add details.

Airbrush in the details, including shadowing, and then add the eyeballs.
I put another roll of fondant over the eyes at this point, too, for the little eyelids.
The cake will look shiny because of the food coloring on it, but once it dries the shine will go away.
DO NOT TOUCH the cake while it’s shiny, or the color will wipe off!
I use a paintbrush to do the eyes on dog cakes, not the airbrush.
Small details like that need to be done with a more precise color than the airbrush can give you.
I wanted to give him a snaggletooth, but that would be for a bulldog, not a pug, oh well.
Cover the board with fondant like a blanket and add little modeled accessories like dog toys or a collar and name tag, or in this case, a tongue.