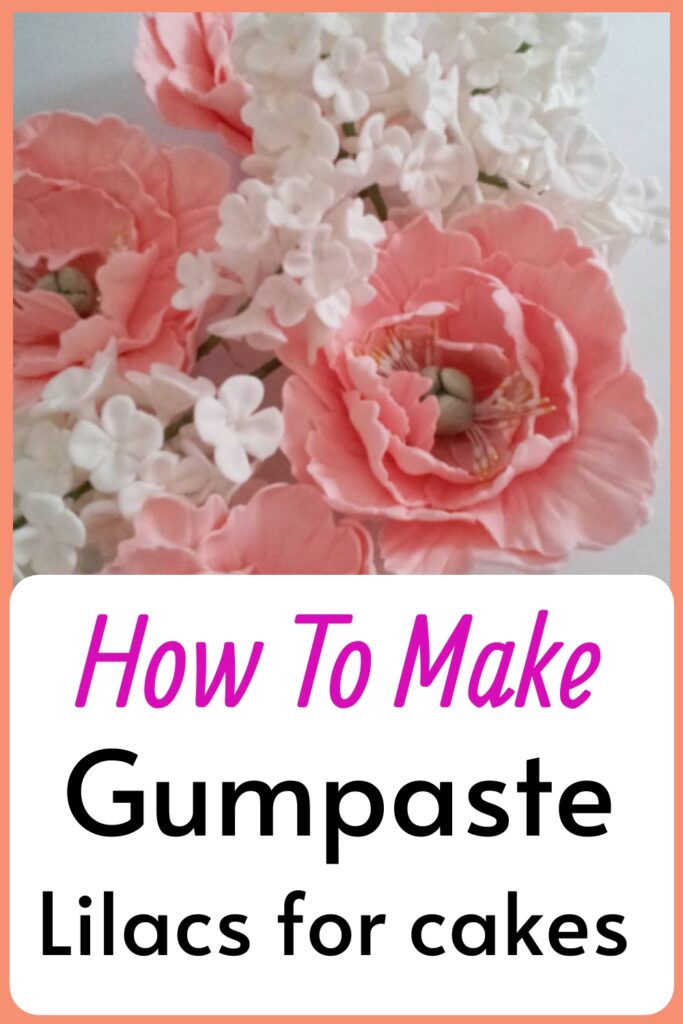
Lilacs are a pretty gumpaste sugar flower for Spring cakes, but they take a LOT of tiny blossoms and buds.
Luckily, one or two of the finished flowers are enough to create a dramatic effect on a tiered cake, along with other flowers that are faster to make!
This article includes affiliate links that will pay a commission if they’re used to purchase something. As an Amazon associate, I earn from qualifying purchases.
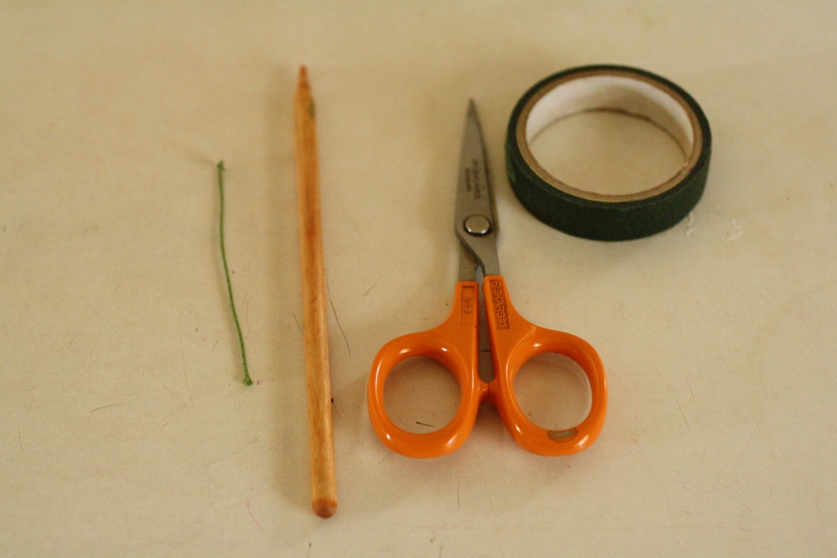
Materials needed to make gumpaste lilacs:
- Thin floral wire
- Dowel with rounded and pointed end
- Small scissors
- Floral tape
- Styrofoam to insert flowers while they dry
- Crisco or cornstarch for keeping paste from sticking to your fingers
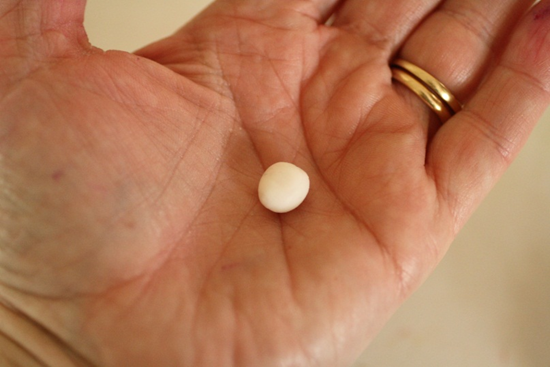
Start with a small piece of gumpaste.
This should be about ¼” across.
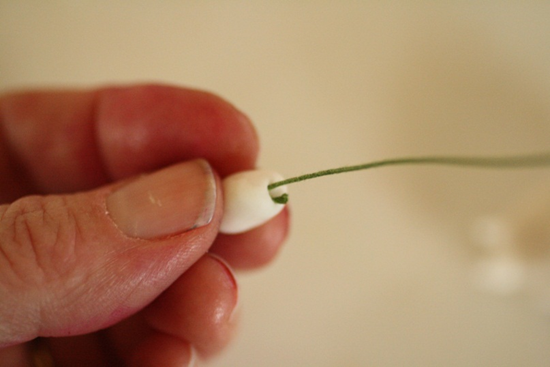
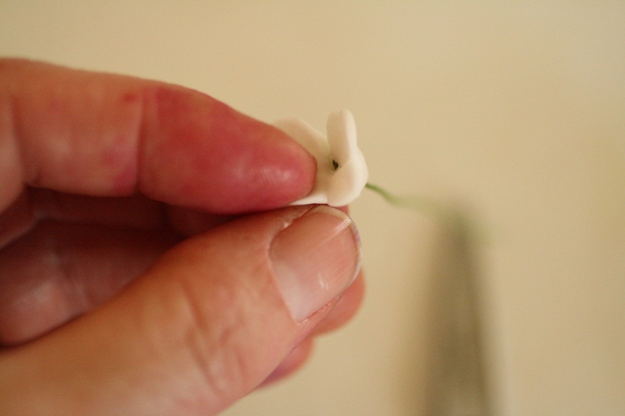
Insert a thin wire, about 28-32 gauge, cut to about 3 to 4” long, and hooked on the end.

Pinch the ball around the base of the wire to make sure it’s attached.
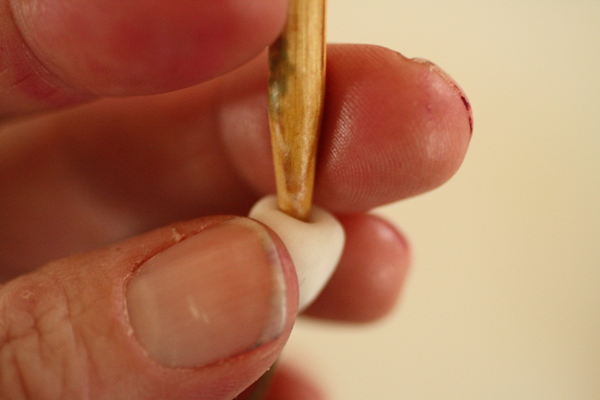
Insert the pointed end of the dowel into the ball to make a center.
Make four short cuts into the ball around the center.
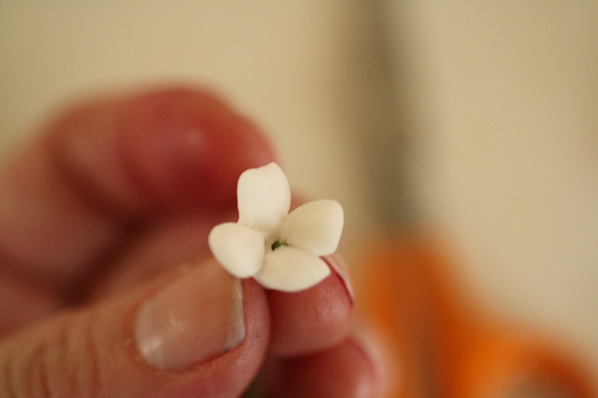
Gently pinch the four sections to flatten them out slightly.
Make sure that the gumpaste is pressed around the wire in the back.
If it makes a little cone-shaped stem on the back, that’s fine.
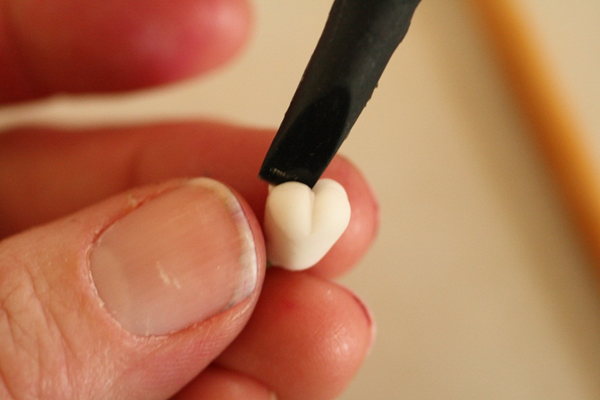
This is the key to making lilacs…Pinch each petal while cupping them at the same time.
Do this by pressing down on the center of the petal with your forefinger while pressing up on either side of that with your thumb and middle finger.
This will result in a tiny curve to the petal and an indentation in the center.
If the petals aren’t curved in this way, they won’t look right when the flower is done.
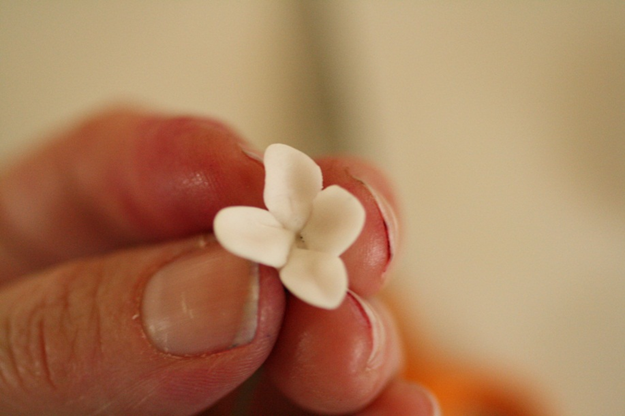
Make some smaller and some larger flowers so that you have a variety. You can leave some not-as-open also.
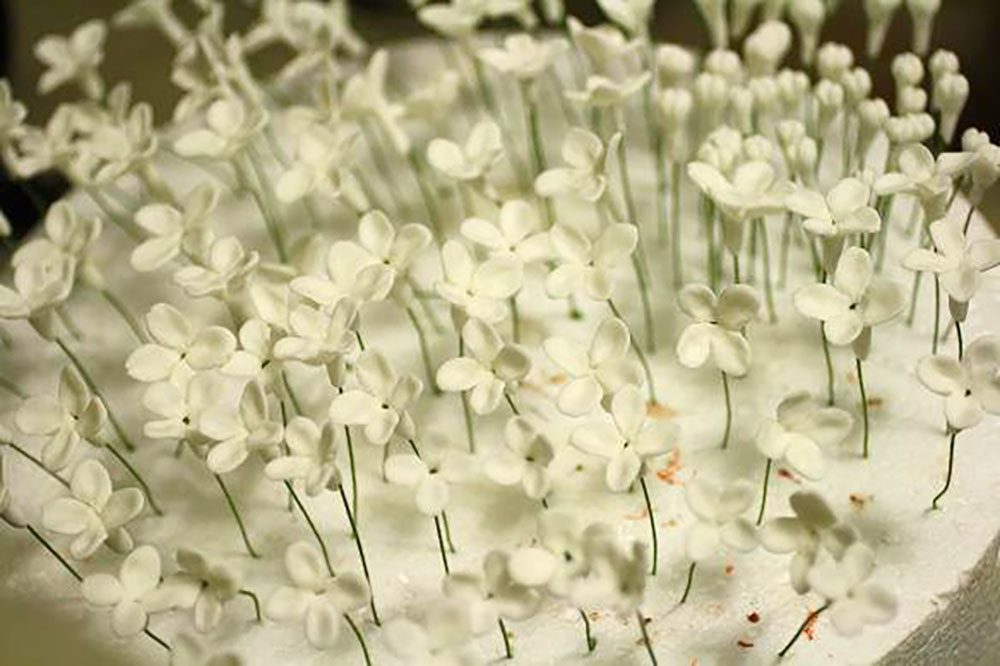
Stick the flower in a piece of styrofoam to dry.
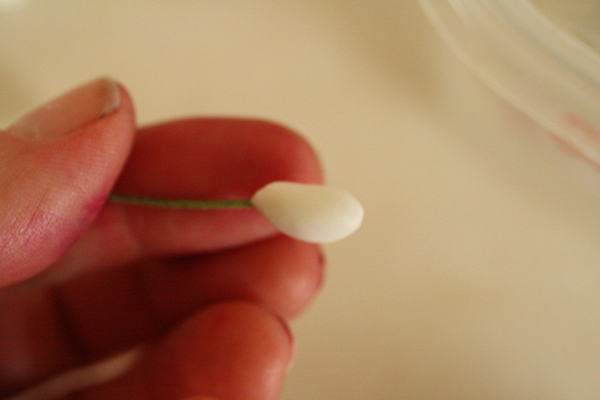
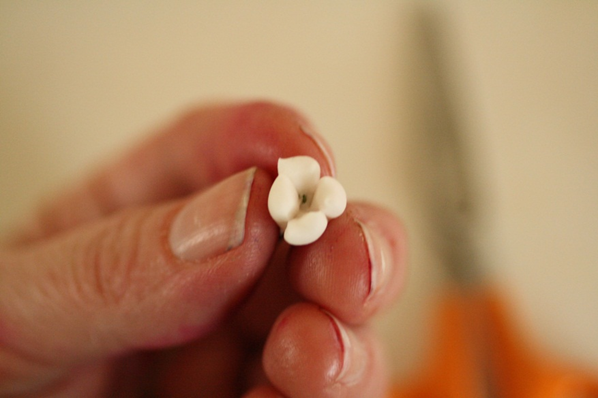
For the buds, attach another small piece of gumpaste to a hooked wire.
Optional step: Take a flat tool or anything that will make an indentation, and press an “x” shape at the top of the bud.
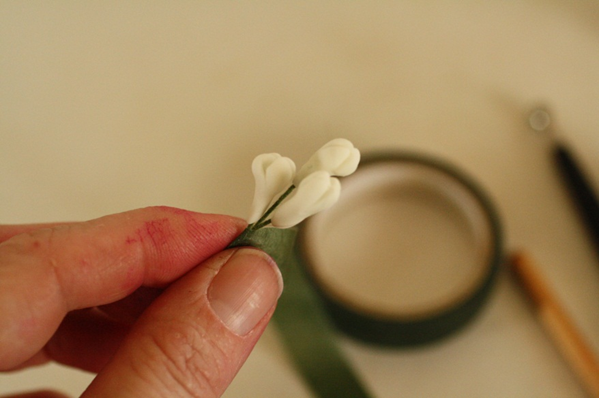
Each lilac bunch should have a few buds at the top of the group.
When the buds and flowers have dried enough to keep their shape, wrap at least three buds with floral tape to start.
Wrap the buds, making sure that they’re slightly uneven and not all on the same level.
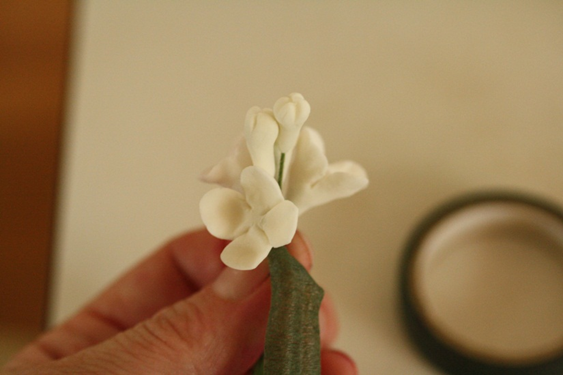
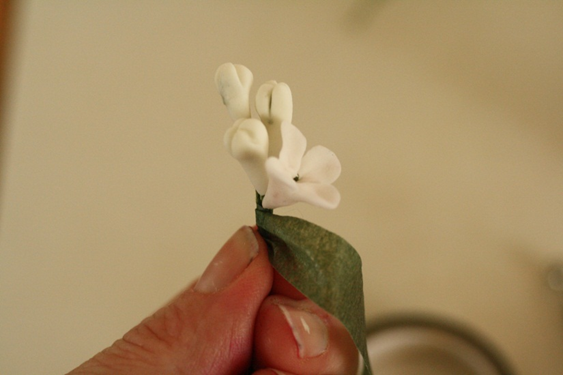
Continue wrapping, adding more flowers as you go.
Smaller flowers should be near the top of the bunch, and as you continue you should add larger flowers so that they stick out from the center more.
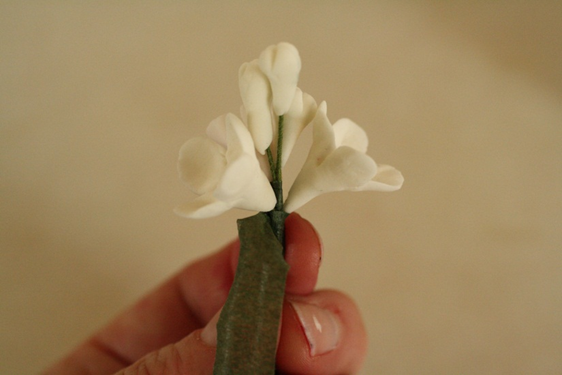
Overlap the flowers to fill in any gaps.
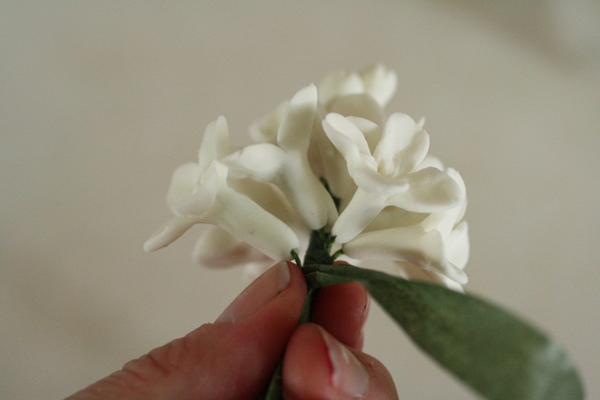
You can use flowers that have a longer stem in back to make the ones on the lower part of the bunch extend from the center more.
This will make the bunch look wider at the base.
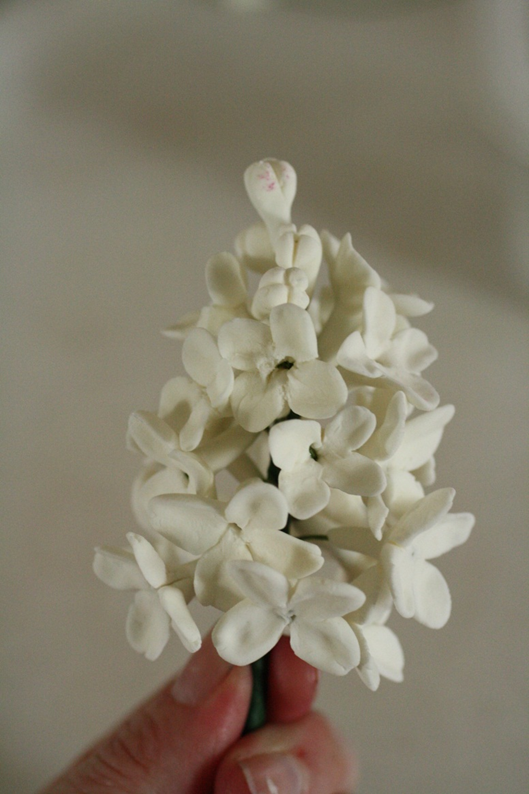
The final bunch should have a variety of sizes and amounts of “openness” to the flowers.
The key to lilacs is that they have both buds and open flowers on each bunch, so the combination makes the flowers more realistic.
You’ll need at least 3 or 4 buds and about 25-30 flowers for each bunch.