When you have a cake that needs branches or sticks, it’s good to avoid inedible things like wires.
Wiring them can be fine if you need to have the structure of the branches in a specific shape, but if the branches will be right up against the cake then it’s good to avoid non-edible elements.

This article includes affiliate links that will pay a commission if they’re used to purchase something. As an Amazon associate, I earn from qualifying purchases.
How to make edible stems and branches
There are a few methods to make edible branches, including using gumpaste or chocolate, piping the branches onto the cake with buttercream, making them out of floral wire, using spaghetti, and making them out of wafer paper.
All but the floral wire method are edible, so they are generally preferable as far as avoiding inedible elements on the cake.
In this article I’ll talk about the spaghetti and wafer paper methods, which are commonly used when people use branches with wafer paper flowers.
I personally prefer the wafer paper branches because they look more realistic, but for vines the spaghetti will do fine. You can also dry the spaghetti in a curved way that you can fit onto a cake, details below!

Materials needed for spaghetti stems:
- Spaghetti noodles
- Water to cook the spaghetti to make curved shapes
- Food coloring
- Cookie sheet lined with parchment paper or a silicone mat to dry the noodles
- Edible glue to attach the leaves to the stems.
Shop for materials to make wafer paper flowers on Amazon:
- Wafer paper, white or colored
- Silicone flower center molds
- Petal veiners
- Petal dust
- Floral wire
- Tylose glue
- Fluffy paintbrushes
- Flower former
- Craft scissors
- Liquid Food Coloring
- Food-grade glycerin to make wafer paper conditioner
- Corn starch
- Flower paper punches
- Steamer to shape wafer paper
Cook the spaghetti or soak it in water.
Cook the spaghetti until it’s flexible but not mushy. It needs to be soft enough to absorb the food coloring, but not so soft that it falls apart. Just a little bit short of al dente is good!
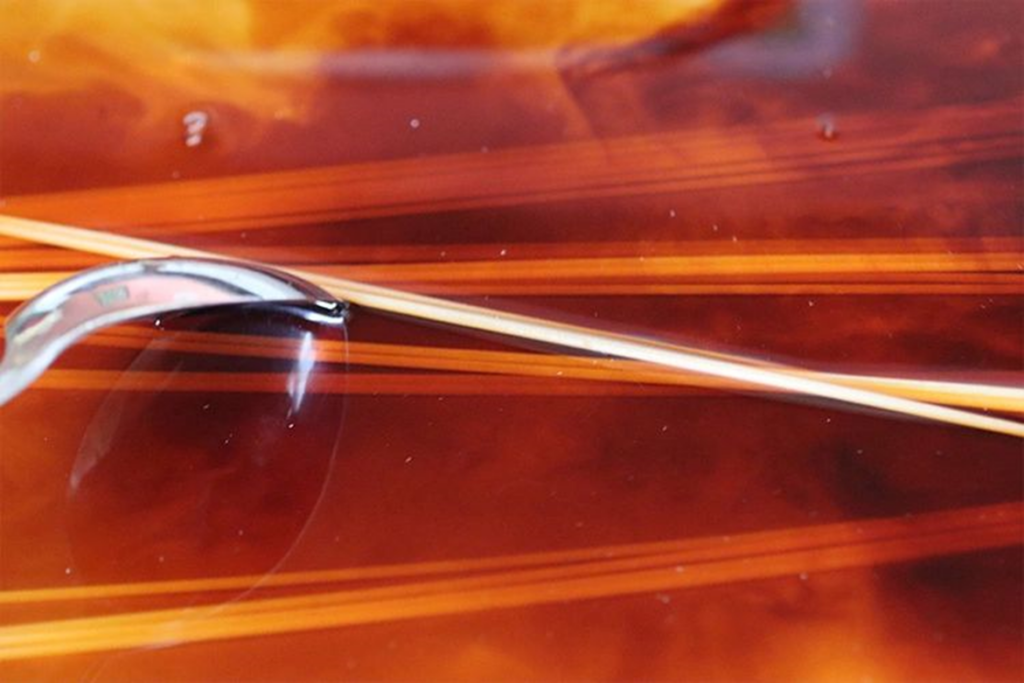
Add food coloring to the water and soak the noodles.
Keep just enough water in the pan to cover the noodles, and add green or brown food coloring to it. Whatever color you use is going to come out lighter than it looks, so using a lot of color is fine.
You might want to pour most of the water out and just leave enough in to cover the noodles to concentrate the color in the liquid.
Soak the noodles in the colored water until they’re a little darker then you want. They’ll lighten a bit as they dry.
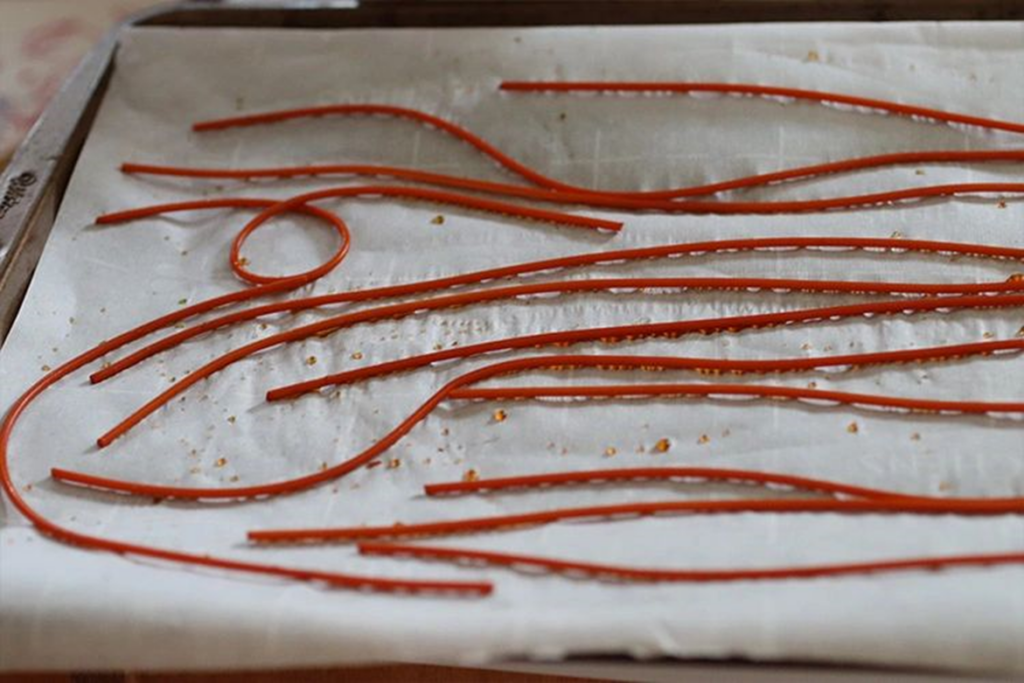
Dry the noodles on the cookie sheet.
Cover the cookie sheet with the parchment paper and place the colored noodles on the paper to dry. You can form them into wavy lines or looped sections if you’re doing a vine that’s supposed to have a wandering shape.
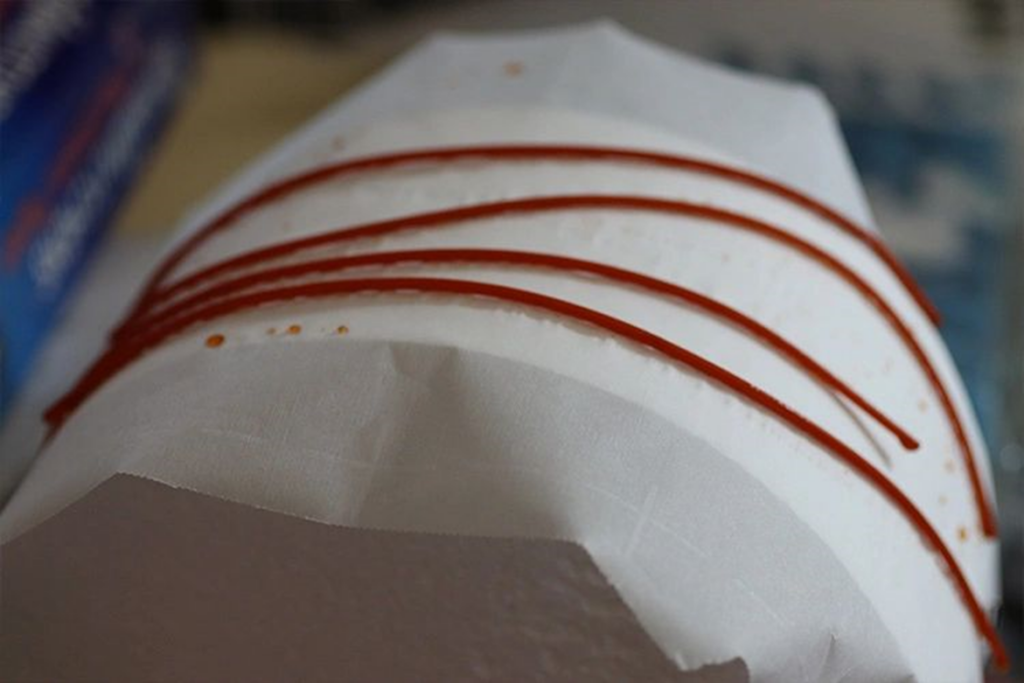
Optional: Dry the noodles in a curved shape using a cake dummy.
If you want to dry the vines in a curved shape to conform to the curve of a cake tier, use a styrofoam cake dummy that you cover in parchment, and dry the noodle on the curved side of the tier. This will make it form the shape of the tier and you’ll be able to fit it around the cake. Use a cake dummy that’s an inch larger than the tier the vine will be placed on.
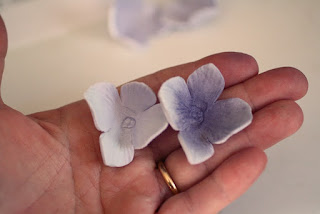
Attach the leaves to the stems with edible glue
Using edible glue, attach the base of the leaves to the dry stem. You might have to fold the paper over the stem and attach it to itself to get it to really grab onto the stem.
It’s a lot easier to attach the leaves to the stems if there’s a “tail” on the leaf that you can wet and curl around so that it attaches the leaf to itself. If you attach the leaf around the stem, then pinch the base, it can help to define the base of the leaf.
Also, too much glycerin in the leaves will make it really hard to attach the paper, because the glycerin resists the moisture from the glue. When you make the leaves, try to keep the tail end dry so that it’s easier to attach to the vine later!
Materials needed for wafer paper stems:
- Wafer paper
- Green or brown food coloring
- Cookie sheet lined with parchment paper or a silicone mat to dry the stems
- Edible glue to attach the leaves to the stems
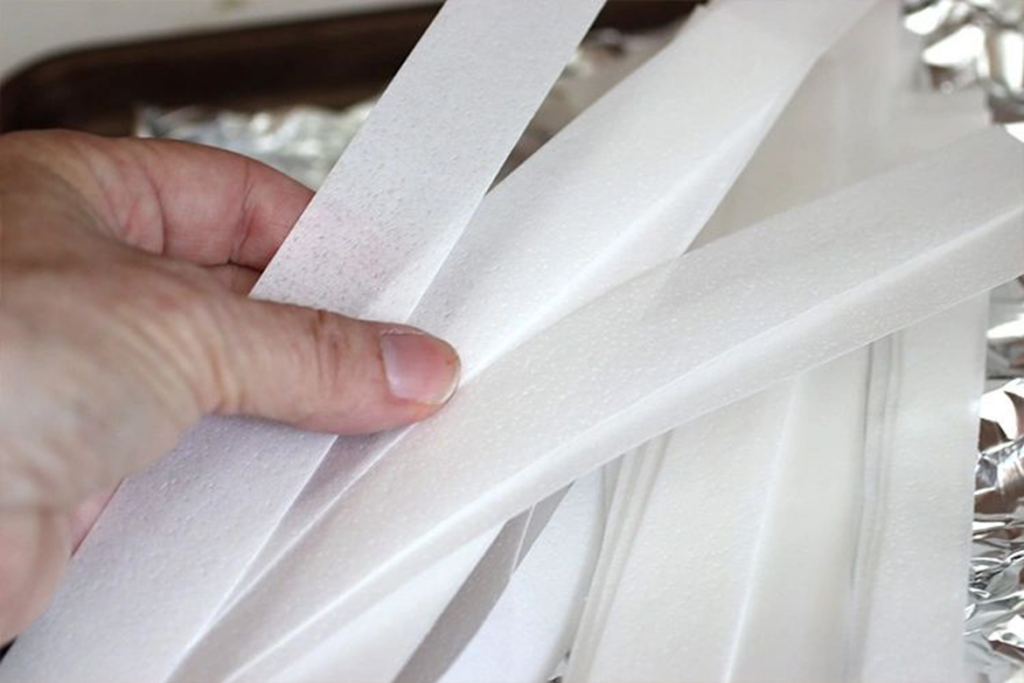
Cut the wafer paper into 1/2″ to 1″ strips lengthwise.
Making the strips thin will create thinner sticks, but I find that 1/2″ wide strips are about the smallest that it’s possible to work with before you start tearing everything.
Make the paint.
Start with wafer paper conditioner or vodka/water and glycerin. Just put a little glycerin in, or dilute the conditioner with the vodka or water so that it dries without making the wafer paper super flexible.
Add the food coloring until it’s a little lighter than you think it should be. In this case it’s better to keep the color a little lighter than you think you’ll want it, because you’re going to be creating layers of the paper, and that can make it look darker.

Wet the wafer paper strips.
Using the colored wafer paper conditioner/food coloring combination, paint the wafer paper strips with the liquid.
This is a super messy process, and you can wear gloves if you don’t want to get the food coloring all over your hands. I prefer to work with no gloves, because it’s easier to feel what’s going on with air bubbles inside the stems as you make them.
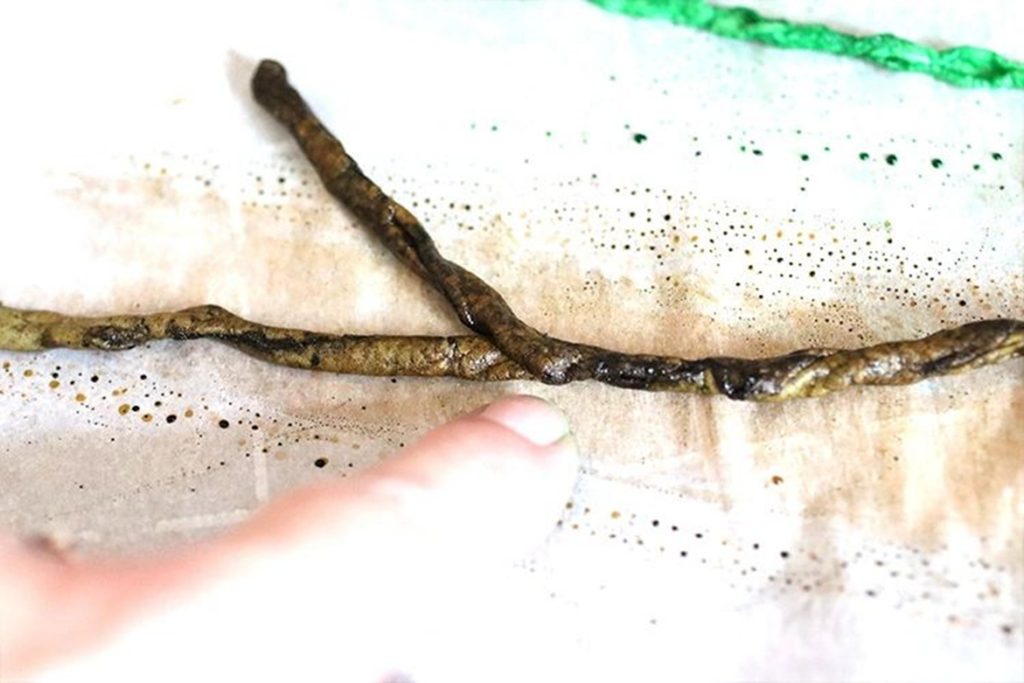
Start folding the strips of wet paper onto themselves and squeeze them together to attach them. Make a little stick by rolling the paper between your fingers to shape it into a rolled stick shape, and keep working it until it’s rounded and stick-shaped.
Wet wafer paper feels slimy, so be prepared. It could also tear, but if that happens press it against itself to stick it together and keep working. You can also use torn sections as shorter sections that branch off of the main stick by attaching them together in a branching arrangement.
Pro tip: The more glycerin you have in the paint you use on the branches, the more flexible it will be when it dries. If you need a branch to conform to the shape of your cake, like when you need to wrap it around a tier. make it with a 25/70 glycerin water mixture, and the branch will end up being very flexible when it sets. You’ll be able to bend it around the tier easily.
Dry the stems and add more wafer paper if needed.
Put the branches on the parchment-covered cookie sheet and let them dry thoroughly, often overnight. They might be a little flexible when they dry, depending on how much glycerin you put in the paint, but assume that they’ll snap if you bend them too far!
If you want your branches to be thicker, just add another strip of colored paper to it and roll it together the same way.
Pro tip: If you have the leaves and flowers ready, you can attach them to the branch before it dries. That can avoid the difficulty of attaching a flower to the solid branch, because when the sticks dry they’re hard to attach things to!
Optional: Dry in curving positions around a cake dummy.
(See the same section about under the instructions for the spaghetti branches!)
Attach flowers and leaves to the stems.
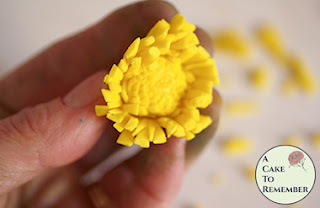
Using edible glue, attach unwired edible flowers and leaves to the branch to make it look like it’s flowering. This is a good technique to use for cherry blossom cakes that have the branches on them, and it also avoids placing wires on the cake.
I’ll be honest, these are NOT easy to attach the wafer paper leaves to. When the branches dry they resist having things attached to them. You might have to really wet a spot on the branch to get it primed to stick to the leaf, or wrap the leaf around it.
If the leaves have too much glycerin it can make it hard to get them to stick to themselves if you end up having to wrap the leaf around the branch. Try to keep the tail end of the leaves glycerin-free so that it will stick to itself when you wet it later.
One way to disguise the join of the leaves on the branch would be to attach a flower to the spot where the leaf hits the branch. That way nobody will see if the leaf is wrapped around the branch and not attached at the base of the leaf.
Edible branches are a nice touch of realism and provide safe greenery for autumn themed wedding cakes because they don’t contain wires. You can make them ahead of time to use as filler, or add flowers to them to use as a focal piece on cakes.