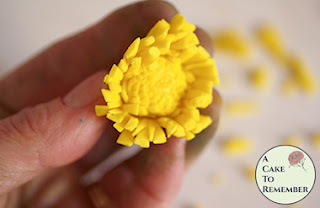
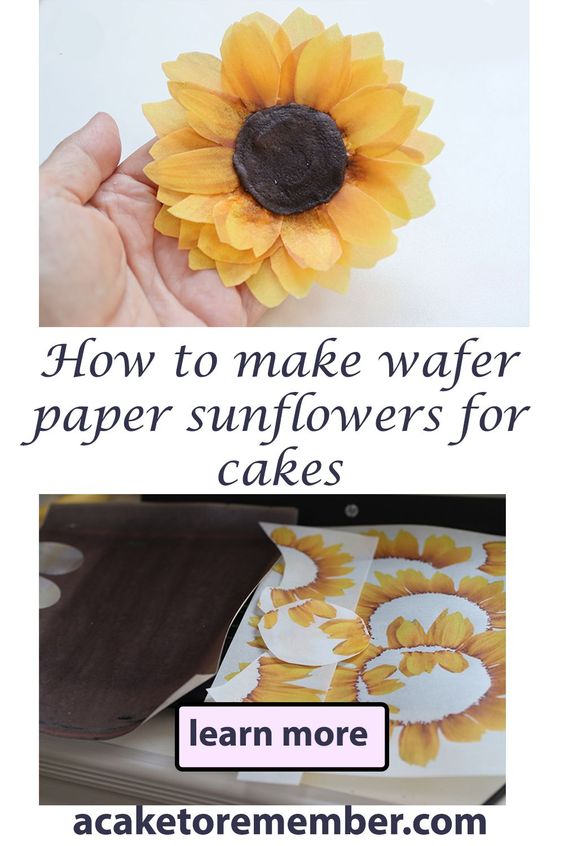
Sunflowers are a popular choice for spring wedding cakes, and they can be made with any number of edible mediums including gum paste, fondant, wafer paper, and candy clay.
In this tutorial I use a wafer paper sunflower kit that I have for sale on my website, but you can use plain yellow wafer paper without buying the kit if you want to do it that way.
This article includes affiliate links that will pay a commission if they’re used to purchase something. As an Amazon associate, I earn from qualifying purchases.
Materials Needed:
- Yellow and brown wafer paper, or the pre-printed kit available here: Sunflower wafer paper kit
- Water or vodka to wet the wafer paper, either in a spray bottle or to use with a paintbrush.
- Silicone flower center mold or another round form that lets you shape the center.
- Petal dusts (optional)
- Floral wire (optional for wired flowers)
- Scissors
- Wire cutters for the wire
You can also use white wafer paper and food coloring or petal dusts to color the paper, but it’s easier to start with a colored paper for the best coverage.
Shop for materials to make wafer paper flowers on Amazon:
- Wafer paper, white or colored
- Silicone flower center molds
- Petal veiners
- Petal dust
- Floral wire
- Tylose glue
- Fluffy paintbrushes
- Flower former
- Craft scissors
- Liquid Food Coloring
- Food-grade glycerin to make wafer paper conditioner
- Corn starch
- Flower paper punches
- Steamer to shape wafer paper

Make the centers.
To create the centers, use the brown wafer paper and cut out circles that are slightly larger than the flower center mold that you’re using.
Placing the colored side down, put one circle of the brown paper into the mold, then spray it lightly with vodka or water, or brush the liquid on using a paintbrush.

After wetting the first layer, add another circle of brown or white paper onto the first, and continue until you have a piece that’s about four layers thick. Alternately, you can just use a couple of brown discs, then layer in some white ones that are smaller to make a thicker center.

If you want to add a wire, this is when you should do that. Take the floral wire and bend it so that there’s a round or angled “foot” on it that can be pressed flat against the layers of wafer paper in the center mold.
Press it into the wet wafer paper and make sure that the end of the wire sticks straight up off of the mold like a normal stem would.
Using more wafer paper rounds, keep stacking them with the wire sandwiched between the layers until you have a center that’s about 1/8″ to 1/4″ thick and that totally encloses the wire.
Cut a slit into the circles to fit them around the wire, or slide the disc down the wire by poking a hole in the center and pressing it down.
If you’re not using a wire in the flower, just keep layering the circles without inserting the wire. Sunflowers have fairly thick centers, so they tend to look better when you make the center thicker.


When the center is thick enough, thread a larger circle onto the full center, with the brown facing out or in, whichever you prefer. Gently fold the edges of the paper toward the middle of the center so that the outer edge is smooth and rounded.
Press the damp center into the mold to get the impression of the texture on it.
Leave the center in the mold until it dries enough that you can remove it from the mold. Place it flat on a cookie sheet or other surface that the wafer paper won’t stick to, like a silicone mat, and let it dry completely or almost completely.

Trim the center to be round if there are any sections that aren’t even. This might not be necessary if you make a thicker center, but if it’s on the thinner side it could shrivel on the edges and distort the round shape a little, so it might need to be trimmed.
When the center is dried enough, you’ll be able to pick it up by the wire and it shouldn’t move around on the wire. If it does move, you might have to reinforce the back of the center where the wire goes into it by wrapping a little more damp wafer paper around the wire to form a cone. This will secure the wire to the flower center and it shouldn’t move.
Let the center dry enough so that it can be picked up without losing the shape. In the meantime, cut out the petals.

Add the petals.
Using either the sunflower wafer paper kit or white paper, cut out enough petals to form two rows of petals on the finished flower. If you start with white paper, color it yellow first by brushing it with yellow dust, by using an oil-based food color or petal dust mixed into shortening. Leave a white edge on each petal or section of petals so that you can attach the white section to the flower center.

Using a little vodka or water, apply a bit of liquid to the back of the wafer paper center to make it slightly sticky.
I use a spray bottle, but you can brush it on with a paintbrush. Don’t get it too wet, but add enough to make it slightly sticky.

Press the petals onto the back of the flower center, with the yellow part of the petals facing up. Create one full row of petals that goes completely around the flower center.
I find that it’s easier to place the petals when they’re cut out individually, but you can cut them in sections of two or three petals if you want to.

Repeating the last steps, make a second row of petals that overlaps the first row to cover gaps between the petals. Sunflowers only have a couple of rows of petals, but you can add an additional one if you want them to look fuller.
Dry the flower upside down, resting on the center, so that the petals fall toward the top of the flower center. When they dry completely, turn the flower over and the petals will remain curved toward the center of the flower or flat.

When the flower is dry, you’ll be able to trim the edges of any petals that are too long so that the shape of the flower is rounded.
If you used the printed sunflower petals kit you probably won’t need to do any additional coloring, but if you started with flat yellow paper you can add some petal dust details to the flower.
Sunflower petals are short and don’t curve very much, so there isn’t much need to manipulate them. If you do want to add some movement to them, you can wave the flower over a pot of boiling water to allow the steam to make some of the petals move a little.
You can also add a “fringe” of tiny petals to the center before adding the larger petals. To do this, cut a circle of yellow wafer paper that’s about 1″ larger than the diameter of the flower center, then cut tiny slits in the outer 1/2″ of the edge of the circle.
Attach the fringed circle to the center using some more liquid and allow it to dry. If the fringe ends up looking too long, you can trim it shorter before attaching the outer petals.

After making this sunflower, I still have about 3/4 of the sunflower petal kit left over. The kit should allow you to make 4-5 medium-sized sunflowers or more smaller ones.
Cake sunflowers can be made in any size to fit cakes or cupcakes, and they make a nice addition to summer-themed cakes.
You can make the centers ahead of time to have them ready to use when you need to make some sunflowers to place on a cake, or to use in an arrangement on a rustic wedding cake.
To get the printed wafer sunflower kit, click here