Painting on fondant is a fun way to really customize a cake, since you’ll have artistic freedom to create the design and individualize it.
These are some tips that I learned the hard way, so I hope they help you with your painted cakes.
This article includes affiliate links that will pay a commission if they’re used to purchase something. As an Amazon associate, I earn from qualifying purchases.
1. Paint on fondant, not buttercream for the best result.
First, for these tips, I’m assuming that you’re painting on fondant.
Painting on buttercream is more complicated, so fondant is the easier place to start.
Fondant will give you a smooth, continuous surface to paint and draw on, and the color won’t absorb into the surface the same way that it will on buttercream.
It’s possible to paint on buttercream, but you have to use a lot more caution because the color can dissolve the icing and end up making it uneven and grainy looking.
2. Draw the outlines first using edible markers.
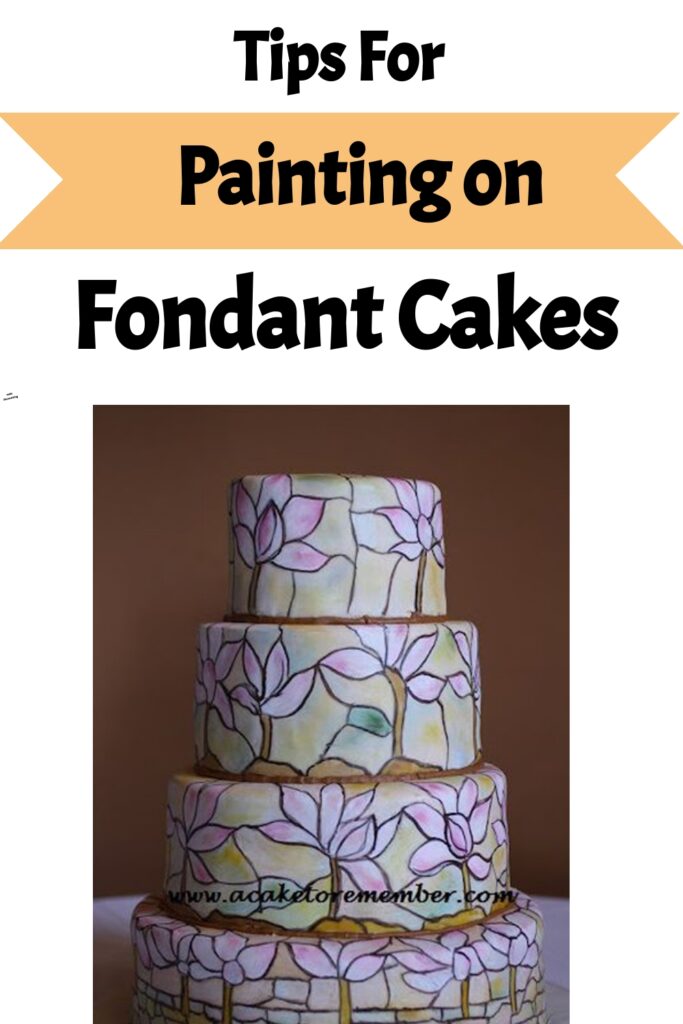
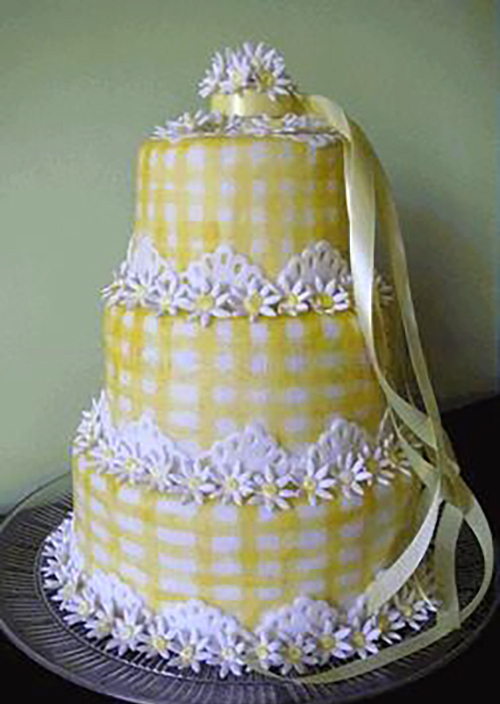
To do this stained glass cake I did the outlines of the shapes first using a food coloring marker.
That will give you a light line to follow, but you could also paint it freehand.
Outlining the main shapes will give you a guideline to work with, and it can help you to make sure that the entire design will fit on the tiers.
Use a light color for this so that you can cover up mistakes with the darker color that you paint on later.
When you’re drawing the design, be careful to press very lightly on the cake so that you avoid digging into the fondant and creating imprinted lines.
If you make mistakes here, you can take a damp paper towel and rub the line gently to erase it as much as you can. That’s why using a light color is the best idea for this step.
3. Add the lighter colors first.
The next step is to go in and put in the lighter colors.
This will prevent the paintbrush from accidentally picking up any dark colors and dragging them into the lighter areas while you’re painting.
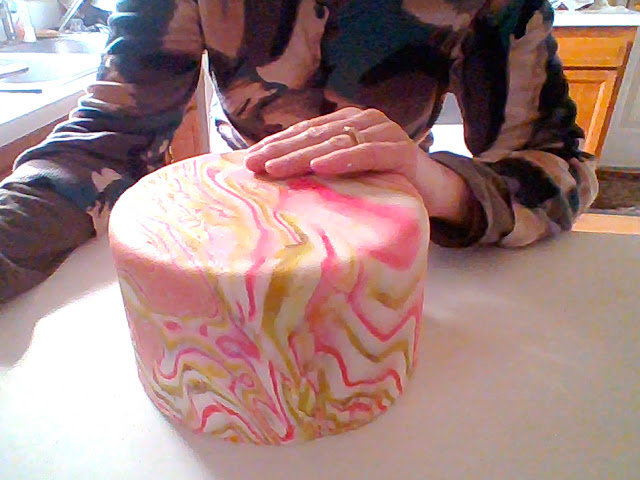
To do the color, I used a titanium dioxide white food coloring with full color mixed into it.
If you want the color to be lighter or more translucent, you can use liquid food coloring or airbrush color diluted with vodka.
If a color isn’t as dark as you want it to be, you can go back in and add a less-diluted color to make it less transparent.
4. Let the cake dry between colors.
After the light colors are in place, let the cake dry and them go back in and add the darker colors.
Making sure that the colors are totally dry will prevent the colors from bleeding into each other.
If the cake has to be refrigerated be careful to avoid condensation forming on the surface when you’re painting it.
The condensation can melt the color and make it more likely to bleed.
Paint the cake when there’s no condensation on the surface, and if any forms when you take it out of the fridge, don’t touch it until the surface dries out.
(Another way to make edible paint is detailed in this article here: How to make opaque edible paint for fondant and gumpaste.)

5. Pay attention to the edible paint’s consistency and beading.
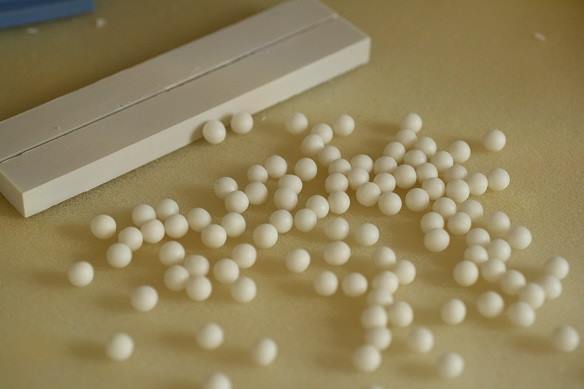
If you’re using titanium dioxide paint and the white starts to bead up on the cake surface, mix some cornstarch or powdered sugar into it to make it more resistant to the beading.
If it’s too thick, you can thin it out with vodka, but that can make it bead up more, so adding a little more cornstarch will help.
It sounds counterintuitive, but when you add the corn starch it makes it grip better but doesn’t thicken it back to where it was to start.
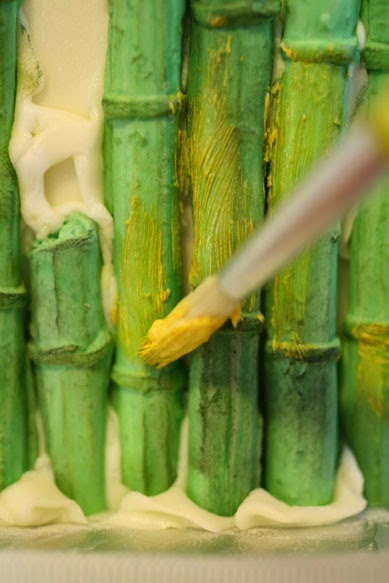
6. Set the color with petal dust and paint the outlines last.
When you’re done painting the surface of the cake, let it dry completely, then go back and touch the color up using powdered food color or petal dust.
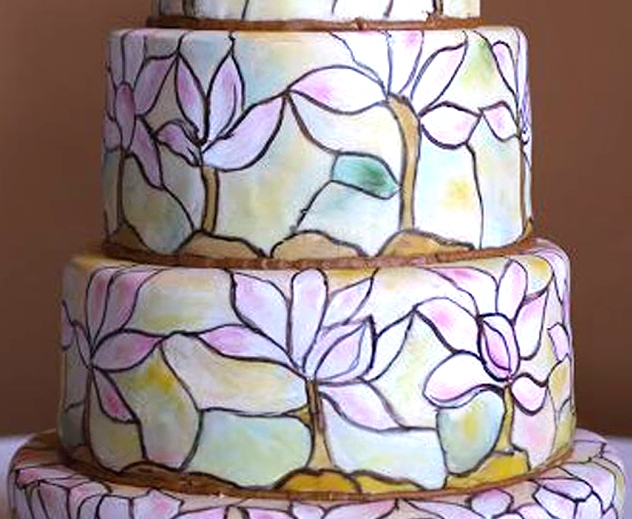
See the green leaf on the tier second from the top? And the more yellow sections on the middle tiers?
Those were done with petal dust. Use a large fluffy brush and dust away, it will give you a better depth of color and graduated shading.
Adding the powdered colors will also end up setting the food coloring paint a little bit and will help to prevent it from rubbing off.
When you’re done with the color, paint the outlines of the shapes with a darker outline color if you want to make the final outline darker.
For this cake, I used a dark brown with a little black in it since the black on its own looked too harsh.