To get the best result when you bake cakes, whether from scratch or using a mix, there are some things that you should learn about your ingredients and equipment.
These are some of the basics that I learned when was in Culinary school for pastry, as well as from baking custom wedding cakes for 20+ years.
This article includes affiliate links that will pay a commission if they’re used to purchase something. As an Amazon associate, I earn from qualifying purchases.
Baking Tips for Cakes.
Use room temperature ingredients.
When you’re baking, you need to make sure that everything is at room temperature so that it all mixes in thoroughly the right way.
Butter is especially important, because as the fat in the recipe it needs to emulsify, and if it’s too cold it will make your batter grainy or lumpy.
You want the butter in your recipe to be well mixed in and you want the batter to be smooth so that it bakes evenly and the fat is distributed correctly.
Putting cold butter in the microwave for ten seconds will usually soften it enough that it can be added to a batter, but letting it sit out at room temp to warm up is best.
Use the right ingredients.
Only use the ingredients that it says in the recipe. Recipes are formulas, not just a random mix of ingredients.
When I first went to culinary school for baking, the chef instructors were very firm on the fact that baking is science.
At first I thought that was pretty snobby, but I quickly realized that they were right, and then if you mess around with the balances of fat, salt, gluten, and liquids, it’s not going to give you the same result that it will if you follow the actual recipe the right way.
Use the best quality extracts.
If you use cheap extracts, you’re not going to get the best flavor because you’re probably going to be dealing with artificial flavors instead of the real thing.
When I was doing custom wedding cakes, I baked everything from scratch, and I only used the best extracts that I could find.
A lot of times that wasn’t even an extract, it was an actual oil from whatever it was, like lemon or lime.
The best ones that I found were the Boyajian brand, because they’re all natural, they’re very concentrated, and because of that, a little goes a long way.
Amoretti flavor pastes are also really good for flavoring cake batters and icing. They give you a good flavor without adding a lot of liquid, which can throw the balance of ingredients off.
Be careful when substituting liquids.
People try to adapt a regular recipe to be vegan, or to use a nut milk instead of real milk all the time, but it doesn’t always work.
The reason for that is usually because of the fat content in the substituted liquid.
When you’re substituting ingredients, you need to make sure that the function of the thing you’re pulling out of the recipe is replaced by the new ingredient in the same way.
A good example of this would be using skim milk instead of whole milk.
Since the fat content of skim milk is zero, or close to it, the fat ratios in the batter are going to be affected, and you’re not going to get the same result.
Depending on the other ingredients in the recipe it might not be a huge difference, but it definitely can affect the final product, so you need to be careful about that.
Check the fat content on any nut milk or soy milk that you want to substitute and make sure that it’s similar to the milk that you’re pulling out so that you’re not reducing the amount of fat in the final batter.
Be careful when substituting fats.
This is the same thing as substituting the milks, because different types of fats are going to affect the final texture of your recipe, and not all fats have the same fat content.
Butter is not 100% fat, it also has liquid and butter solids in it.
So if you substitute Crisco for that, for example, you’re basically increasing the fat content in your recipe even if it’s just a tiny amount.
Going in the other direction, if you substitute margarine for butter, you’re definitely not going to get the same result, because margarine doesn’t bake the same way that butter does, and the balances are just going to be thrown all off in your recipe.
And remember that it’s not really a recipe, it’s a formula, so if you mess up something in the formula you’re not going to get the same result.
You might be able to make up for the fat that you’re pulling out by adding more fat somewhere else, but it’s going to get complicated if you’re not sure what you’re doing, so it’s usually just best to follow the recipe as it’s written.
Baking powder and baking soda aren’t the same thing.
Baking powder and baking soda are not the same thing, and they won’t give you the same results in a recipe.
Baking powder is basically baking soda with cream of tartar added as an acid. It creates a different kind of reaction in the recipes then baking soda on its own does.
Your baking powder can also expire, so if your can of baking powder is really old you might want to get a new one.
Baking powder creates some of the lift in baking because of the chemical reaction between the baking soda and the acid in it, so if those ingredients are older the reaction might not work, and your baked goods won’t rise as much as they should.
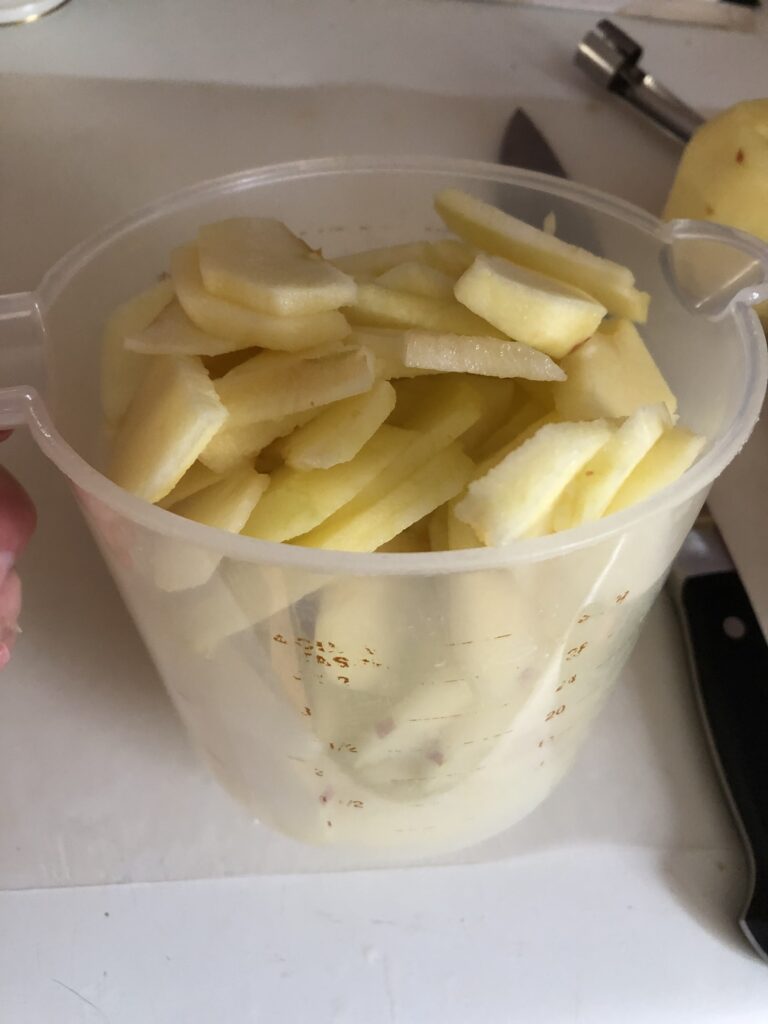
Use the right kind of flour.
If the recipe calls for all purpose flour or cake flour, use the one that it calls for and don’t try to mix them up.
There are different types of flours that have different protein contents, and the higher the protein in the flour the more gluten it’s going to develop when you add the liquid to it and mix it.
The more gluten in a flour the tougher the final result is going to be, so if a recipe calls for cake flour and you use bread flour it’s going to be a vastly different result as far as how tough the final cake is.
At one point I was looking for pastry flour and I couldn’t find it, but then I realized that the biscuit flour that they sell where I live is the same protein content as pastry flour.
When I use the biscuit flour instead of the cake flour, my cakes tasted a little tougher. I could definitely tell the difference, so it’s important to keep to the right type of flour that the recipe calls for.
Follow the recipe as it’s written.
Unless you’re very well-versed in what each ingredient does, just follow the recipe and don’t try to get creative.
This goes back to what I said earlier about baking being science, and bakers referring to baking recipes as formulas, not recipes.
If you’re cooking you can get creative and change the balances of herbs and liquid and that kind of thing, but you definitely shouldn’t do that with a baking recipe.
What I used to do is make the recipe once the way it’s written, and then I would adjust it the way that I needed to in order to get the right texture or the right flavor, based on what I know about baking and what different ingredients do.
To get the best result, don’t substitute ingredients, don’t change baking times, use the right cake pan size, just do what the baking recipe tells you to do and you’ll be fine.
Don’t guess on measuring.
Again, this goes back to the science thing.
Since different ingredients do serve different purposes in baking, you want to make sure that you’re measuring things the right way.
A lot of people will scoop flour out of a container instead of sprinkling it in using a spoon or sifting it.
Depending on what the recipe calls for, that might be okay, but for the most part you don’t want to scoop flour because it packs it down.
When you pack flour down, you’ll be using more flour than the recipe calls for without even realizing it.
It’s okay to scoop sugar, because that doesn’t pack, but for flour you should definitely sprinkle it into the measuring cup with a spoon, and then sweep the measuring cup flat on the top with the back of a knife in order to measure it correctly.
You don’t even need to sift it, unless it says to do that, but sifting is another way to make sure that you’re not packing it.
Having said that, sometimes sifting does aerate the flour too much and you might not have enough in the measuring cup when you’re done.
But as long as you’re not packing it, you’ll probably be okay.
Make sure to scrape the bowl when you’re adding ingredients and mixing.
Don’t just dump ingredients in and keep stirring everything.
Take the time to stop the mixer and scrape the bottom of the bowl so that any ingredients that are stuck to the bottom will incorporate evenly.
That way, you’ll get everything mixed in in an evenly emulsified batter, and you’ll end up with a cake that doesn’t have lumps of unidentified ingredients in it after it bakes up.
Adding things in bit by bot and not all at once is another way to make sure that things incorporate evenly, but bowl scraping is still a must.
Don’t overbeat the batter.
I know that it will be tempting sometimes, but you don’t want to beat the cake batter too much because that will develop too much gluten, and it will make the cake too tough when it’s done baking.
We referred to this as “inferior product” in culinary school, and if you’re baking from scratch it’s relatively easy to do that unless you’re really watching what you’re doing.
If the recipe says to beat until the ingredients are Incorporated, just do that, and then stop.
Some recipes do call for longer mixing times, so that’s fine, but definitely follow the recipe on this and don’t wing it.
Equipment tips for baking cakes.
Your equipment does matter.
If the recipe calls for mixing by hand, mix it by hand.
If the recipe calls for using a stand mixer, you can probably get away with a hand mixer, but you might not be able to get the same texture, depending on what you’re making.
I had some recipes that required a blender instead of a mixer, and the mixer would not work with them.
You can try to substitute different equipment, but following the instructions in the recipe is always the best bet to get the best result.
Use the right pans.
The kind of pens that you use is important, but you don’t need to use the most expensive ones to get the best result.
You can use regular metal pans that are not super expensive and have the cake baked perfectly, or you can use super expensive pans and still burn the cake.
I would avoid the silicone pans because they’re just a little weird to me, and you do want the metal to absorb the heat so that it bakes the right way.
I wrote an article for cake pans for beginners, so if you want to check that out click here for that.
Prep your pans the right way.
The easiest way to prepare a cake pan to bake and get the best result is to line them on the bottom with either silicone or parchment paper liners that fit the bottom of the pan evenly.
As far as greasing and flouring the sides of the pan, I never did that, because it didn’t make sense to me.
However, this might be something that you want to do based on what the recipe says, and then experiment on your own later.
But what I used to do is put a liner in the bottom of the cake pan, and then leave the sides of the pan alone, or use a cake collar.
If you have the entire pan lined with wax paper, parchment paper, or a silicone liner, there’s no way that it’s going to stick to the pan, and you’re going to be able to get it out of the pan evenly and without having any kind of tearing of the cake.
As far as the greasing and flouring of the sides, the reason that people do that is to keep the pan from sticking to the cake as it bakes, which is the greasing part. And to give the cake batter something to grip onto as it rises in the pan, which is the flour part.
But if you’re lining the whole thing it’s not going to stick and it grips just fine, so I never worried about the greasing and the flouring.
I just use the liners and everything always came out just fine.
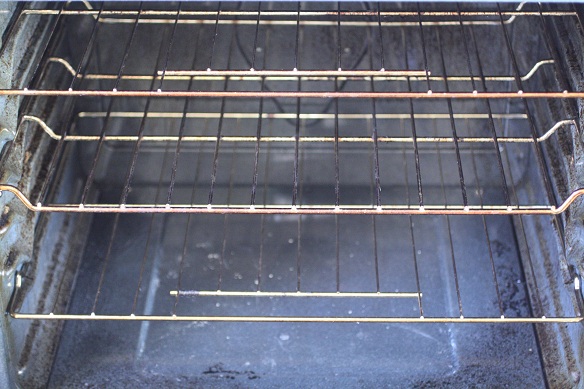
Get to know your oven.
Every oven has a hotspot. I wrote another article about that, so you can read about that more in depth if you click here.
But basically, it just means that there’s one part of every oven that tends to heat up more than others for whatever reason, and you need to be aware of that so that you can avoid putting things in there, because it will bake faster than other parts of the oven.
Some ovens also never really reach the right temperature, so it’s good to have an oven thermometer that you keep in the oven so that you can make sure that it’s at the right temperature for what you need.
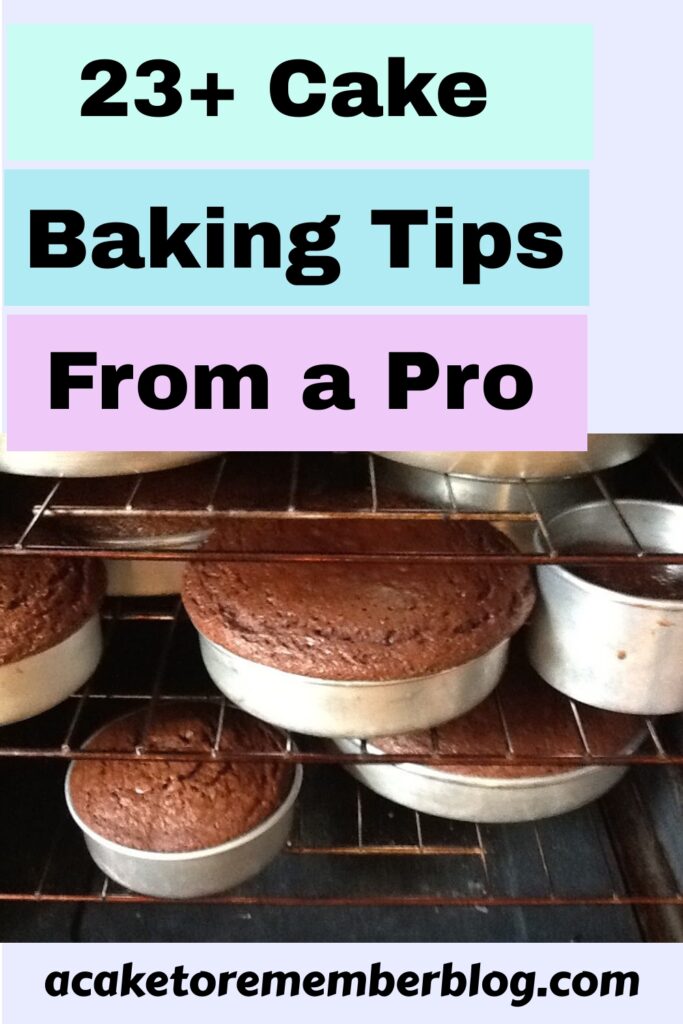
Baking tips for cakes.
Always preheat your oven.
Preheating the oven is really, really important when you’re baking things.
When you put a raw batter in an oven you want it to be hot enough so that it sets the outside structure pretty quickly, and then it can bake the inside.
If the oven is heating up as the batter is sitting in it, the outside structure isn’t going to bake as quickly as it needs to, and it’s going to lead to what we refer to as “inferior product.”
Your cake isn’t going to rise the right way, and it’s not going to have the right texture when it’s done.
Use a timer if you need to.
If you’re baking a lot of cakes or you’re rotating things in and out of the oven, a timer isn’t really going to help you that much, but it is good to use one if you tend to get distracted.
When I was baking all the time, I never used a timer because I could smell when things were done.
Plus, I was opening the oven door a lot to check on cakes and take things in and out, so I was always keeping an eye on things.
You might want to turn a timer on for the minimum baking time so that you can check it at that point.
It’s especially important to do this if you tend to get distracted and you’ll forget that you even have a cake in the oven. We’ve all done it and it doesn’t end well.
Try not to open the oven door until the first 10 minutes of baking has gone by.
The first 10 to 15 minutes of baking anything is the most important because that’s when the basic setting of the structure is done.
If you’re opening the oven a lot, you’re going to be letting the heat out and it’s going to affect how the cake is baking.
Just leave it alone for the first 10 to 15 minutes to give the cake time to get the first structure set, and after that you can move things around if you need to.
Cooling and decorating tips for cakes.
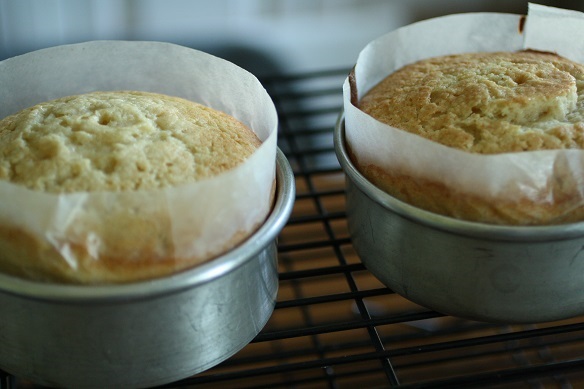
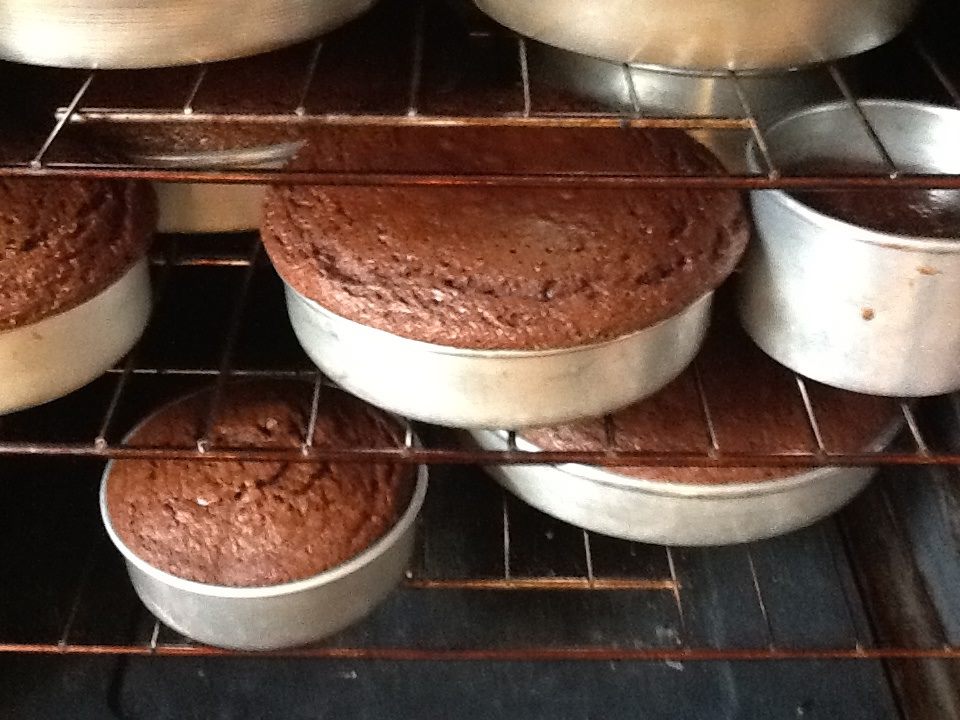
Cool cakes completely.
Most recipes will say cool a cake completely before taking it out of the pan, or before decorating it.
Completely does not mean for 15 minutes. It means completely.
One way that you can do this is to bake a day ahead of time, and let the cakes cool off in the pans 100% by leaving them alone and letting them actually cool off overnight.
When I baked wedding cakes, my schedule was to bake on Thursday, decorate on Friday, and deliver on Saturday.
The cakes would come out of the oven, and I would put them on cooling racks so that air could circulate under the pan and that would help them cool off faster.
Before I took anything out of pans, I would let them cool off for at least an hour, and then if I needed to use the pans for more layers, I would de-pan them then.
If I didn’t need to use the pans again because I was done with that size layer, I just left them in the pan until the next day, because it’s better to do that so that the cake has time to cool off and the structure has time to set.
Depending on what type of cake you’re making, you might need to let it cool off in a different way, but just follow the recipe on that.
You can wrap the cake pans in plastic wrap once they’re cooled to a certain extent, but you don’t want to wrap them while they’re hot, because that will keep moisture inside it and make the cake soggy.
The point is to let the cakes actually cool off and let the structure set at room temperature before you try to decorate them.
Trying to ice a hot cake will only lead to disaster because everything is going to melt.
If you’re desperate, you can try to put the cake in your freezer to cool it down faster, but if you can let it sit out at room temperature that’s just the best way all around.
Let them cool off for a little bit and then wrap them up and let them finish cooling off overnight. Or for at least a few hours before you even try to take them out of the pans.

De-pan cakes the right way.
When you’re taking your cakes out of the pan (after cooling them completely, of course,) you should turn them out onto the cake board that they’ll sit on for decorating.
That’s not going to be the same as the board the finished cake will sit on, this should be a cardboard round that’s the same size as the layer itself so that the cake sits on it without the board sticking out around the bottom of the layer.
To de-pan the cake layer, level the top of the cake while it’s in the pan, then put the board on top of the cake pan and turn it upside down. The cake should come right out if you lined the pan on the sides and bottom.
Wrap the layer in plastic wrap with the board too, or decorate it right away.
You don’t need to freeze cakes.
When I was making wedding cakes I never froze anything if I didn’t have a really good reason to.
Regardless of what anyone says, freezing a cake will affect the texture to a certain extent, and it just never tastes as good as it does when you just leave it out at room temperature.
Some people say that freezing a cake makes it more moist, but that probably happens because ice crystals are forming inside the cake and then when you take it out they melt and make it soggy.
Some people also advocate icing a cake when it’s frozen, but I think that’s risky because you don’t know what it’s going to do when it thaws out.
You cake might be find when it’s frozen solid, but then it could slump or collapse when it’s thawing because it wasn’t structurally sound to begin with, and freezing hid that.
If you’re on a specific schedule and you do need to freeze things, just make sure to wrap everything very well, to avoid any kind of moisture, freezer burn, or smells from the freezer getting into the cake.
I have frozen things in the past that worked just fine, and I wrote an article about that here that you can click to read.
But my best results were always just to bake two days ahead, decorate a day ahead, and then deliver the following day after refrigerating the cake that had been iced.
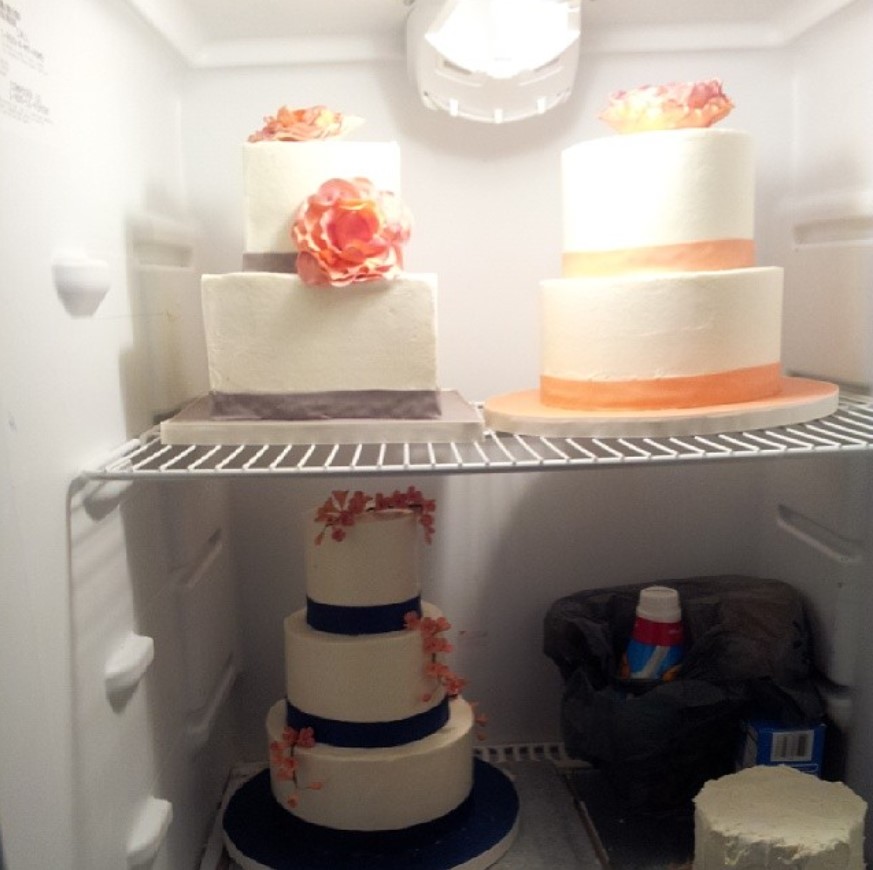
Be careful when refrigerating cakes.
Speaking of refrigerating cakes, it’s best to not refrigerate anything unless it’s already been iced, because the icing will help prevent moisture from being drawn out of the cake by the refrigerator air.
Home refrigerators don’t have the same humidity as commercial refrigerators, so it’s not going to do exactly the same thing as a commercial fridge as far as making the cake melt and colors change and that kind of thing.
A lot of people say to never refrigerate gum paste flowers or wafer paper flowers, and in general it is better not to do that.
But as far as fondant, I never had a problem with fondant being in a home refrigerator, because they’re just isn’t as much humidity as in a commercial fridge.
In a commercial refrigerator the fondant can melt, because the humidity is higher and that moisture can get into the cake and affect the fondant.
But as long as the cake is iced, and has that layer of buttercream or fondant to protect the inside cake, a home refrigerator is fine for prepared cakes.
It’s only when the cake is not iced that the air in the refrigerator will draw moisture out of the cake and it will make it taste dry.
Serve cake at room temperature.
Speaking of refrigerating cakes, it’s okay to refrigerate a cake to store it and to firm it up before you move it to deliver it, but it should always be at room temperature when you serve it.
Cake will get hard when it’s cold, and if you eat cold cake it can feel like it’s stale when it isn’t.
Because of that, always give a cake time to get to room temperature before it’s served.
When I was delivering wedding cakes I never delivered anything at room temperature because it was too risky to move things if the cake wasn’t set and firm.
I stored everything in the fridge until it was ready to deliver, then it was put in a sealed box, and driven to the reception site a couple hours ahead of when the reception actually started.
Letting a wedding cake that’s that large sit out for that long is fine, because it starts out cold and warms up slowly over time, and by the time it’s time to cut the cake the cake is at room temperature.
Plus, certain cakes need to be refrigerated because the fillings are perishable or if it’s something like a cheesecake the whole thing is perishable and we’ll just turn to mush if it’s not cold.
Heat is not your friend with outdoor cakes.
If you ever have to take any cake to an outdoor party or wedding reception, plan for the heat. And the bugs, for that matter.
Icing will melt if it’s too hot, and your cake will end up looking like a melted puddle.
Putting a fan blowing on the cake isn’t a good solution, because you’ll basically be blasting the hot air onto the cake. Fans cool off people but not inanimate objects.
Don’t let your beginning cake debut be ruined because you put it on a table in the full sun at noon in July. It’s not going to end well.