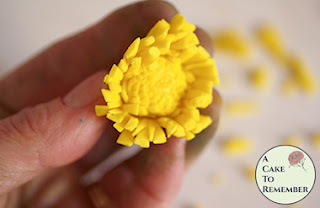
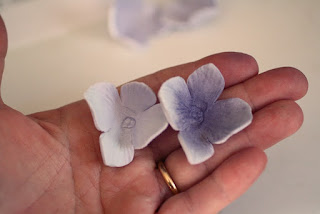
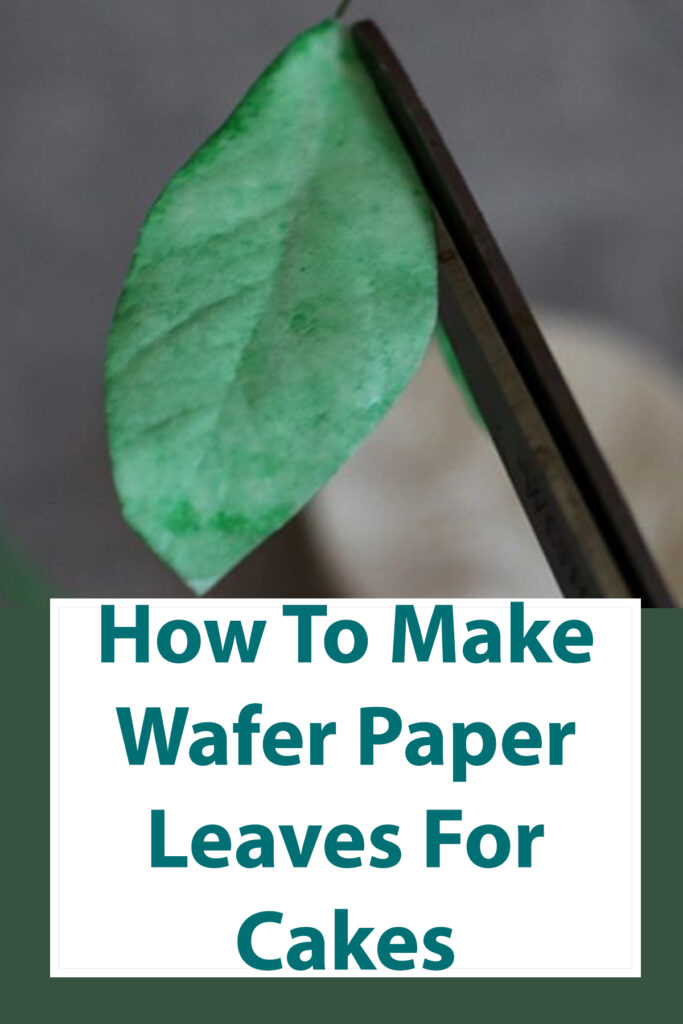
Wafer paper leaves are good for filler in wedding cake floral arrangements, and they make the edible flowers look a little more realistic. You can make them with or without wires, and they can be made ahead of time and stored until you need them.
This article includes affiliate links that will pay a commission if they’re used to purchase something. As an Amazon associate, I earn from qualifying purchases.
How to make wired green wafer paper leaves
Materials needed:
Green floral wire
White wafer paper AD grade
Green food coloring or liquid airbrush color
Wafer paper conditioner or food-grade glycerin
Food-safe paintbrush
Waxed paper or parchment paper, or a flower former
Plate or cookie sheet to work on and to use as a palette
Cornstarch and a puffy brush (optional)
Brown food coloring or petal dusts for accent colors (optional)
Silicone leaf veiner (optional)
Shop for materials to make wafer paper flowers on Amazon:
- Wafer paper, white or colored
- Silicone flower center molds
- Petal veiners
- Petal dust
- Floral wire
- Tylose glue
- Fluffy paintbrushes
- Flower former
- Craft scissors
- Liquid Food Coloring
- Food-grade glycerin to make wafer paper conditioner
- Corn starch
- Flower paper punches
- Steamer to shape wafer paper
Prep the paper and wires to make the leaves.

Cut the wafer paper into strips.
Cut the paper into strips that are as wide as the leaves will be tall. If you want the leaves to be 2″ long, cut 2″ wide strips. Depending on how fat the leaves will be you should be able to get 4 to 6 leaves per strip if you cut the paper width-wise.
Cut the wire to the length that you want the stems to be, but at least 4″ long.
The wire should be long enough to go into the leaves at least halfway up the leaf. It’s better if it can go in farther, but it just needs to be able to be gripped securely by the wafer paper.
Make the green food coloring paint.
The paint can be made from green food coloring, vodka or water, and some glycerin. I used the full-strength wafer paper conditioner and diluted it with some vodka.
The grade AD wafer paper is thick enough that two layers will dry fairly rigid, but too much of the glycerin will make the paper too soft, so you may have to experiment to see how much to use based on your humidity.
Paint the wafer paper.

Paint the wafer paper strips.
Paint one side of a wafer paper strip with a light coat of the green paint. You want to put enough on that it dampens the paper, but not enough to make it really wet.

Place the wires on the paper.
Put the wires on the paper in a row, leaving the amount of space between the leaves that is equal to how wide the leaves will be when you cut them out. For example, if you want the leaves to be 2″ wide, leave 2″ between the wires.

Enclose the wires in the paper.
Press another strip of the wafer paper on top of the first one and sandwich the wires between the two. Press the two strips together firmly and rub them to make sure they’re really adhered to each other. You want to make sure that the wires are really enclosed well.

Add more color to the wafer paper.
Either cut out the leaf shapes first, or paint the entire strip. If you want to paint the whole strip, do that, then skip to the next step.
If you cut the leaves out first, paint them individually with another light coat of the paint. You might want to do both sides, or just the front of the leaf until they dry out a little. If it seems like the wafer paper is getting too wet or too soft, let the paper dry out before adding more color.

Leave the paper to dry until it’s not too floppy.

Cut the sections apart.

Cut out the leaf shapes roughly but don’t worry about getting the shape exact at this point.
Cut the leaf shapes out of the painted paper strips.
Paint the entire strip, then let it dry until it’s easy to pick it up without the paper buckling or wilting. When it’s dry enough, cut the pieces into sections with a wire inside each, then cut out the leaf shapes.


Vein and shape the leaves if desired.
After adding more color to the leaves, press them in a silicone leaf veiner. A rose leaf veiner works well for most types of leaves. Trim the leaf if you want to make the shape narrower or shorter, or to make the part that attaches to the wire narrower.

Dry the leaves until they keep their shape and aren’t sticky.
Dry the leaves.
Put the leaves on the cookie sheet on parchment paper, or on a flower former to give them some dimension as they dry. Let them dry until they can be handled without being sticky. This will take longer if you used water instead of vodka because the water evaporates slower.

Connect the leaves together if desired.
Use floral wire to connect the leaves and make a branch. Start with two leaves and attach them together with green floral tape, then attach more as you work your way down the branch, alternating the placement of the leaves.
This works well with vines that will be wrapped around the cake because you’ll be able to manipulate the wired leaves and place them around the cake tiers.
You can also use the wired leaves in arrangements as foliage filler along with small filler flowers like lilacs or cherry blossoms. Make sure to tell whoever will be cutting the cake that they should be removed before the cake is cut, and that they have wires in them!
If you want to add some additional color accents to the leaves, brush with petal dust or a little more food coloring (don’t get them too wet!)
How to make unwired edible green wafer paper leaves
Materials needed:
White wafer paper
Green food coloring or liquid airbrush color
Wafer paper conditioner or food-grade glycerine
Food-safe paintbrush
Waxed paper or tinfoil, or a flower former
Angled tweezers to pick up the leaves (optional)
Plate to work on and to use as a palette
Cornstarch and a puffy brush (optional)
Spaghetti or wafer paper stems (optional)
Make the green food coloring paint
The paint can be made from green food coloring, vodka or water, and some glycerin.
For unwired leaves you’ll only be using one layer of paper unless you decide to double it up, so you don’t want to put too much glycerin on it. That can make it too soft and it will take a really long time to dry.
Start with a small amount of glycerin, like 1/16 tsp for 4 tsp of vodka or water, and increase the glycerin amount if you need to. The glycerin will keep the leaves flexible, but too much will make them floppy.

Cut out leaves from the wafer paper
Cut leaves out of the wafer paper using scissors or a paper punch. For unwired leaves you can use one layer of paper, or for added strength if you plan to vein them, you can double up the paper by sticking two pieces together before cutting them out. Use the method in the wired flowers section above to attach the sheets together, but omit the wires!


Tap the leaf on the inside of the paint dish to remove any excess color.
Dip the leaves into the paint, or paint them with a brush
I like to just dip the leaves into the paint, but if you prefer to use a paintbrush you can do that. I find that dipping them quickly and tapping the leaf on the inside of the paint container is faster than using the paintbrush, and coats both sides equally without having to turn the leaf over. This avoids the possibility of having the leaf get so wet it gets too soft to handle.
Either wear gloves or just go bare-fingered like I do. Dish soap or shampoo will remove most of the food coloring from your skin!

Put the leaves on the flower former that’s covered with plastic wrap.

Placing the leaves on a veining mat.

Press the leaves into the mat using a paintbrush or foam brush.
Place the leaves on a drying mat or a veining mat
Put the wet leaves on a flower former or other shaping mat that’s covered with plastic wrap. I used plastic wrap to keep the paint from soaking into the former and sticking to it, but you don’t need that if the former or veining mat is made from silicone.
The veining mat is something that I made, it’s silicone and the leaves won’t stick to it when they dry. However, the more glycerin in the liquid, the stickier and limper the paper will be, so if you use a veining mat or flower veiners, you might want to use very little glycerin and mostly vodka or water. When the petals dry they’ll peel up off of the silicone mat and will be stiffer than if they have a lot of glycerin on them.
(Optional) Press the wet leaf onto a silicone veiner
When the leaf dries enough to be handled and before they’re totally dry, you can vein them in a leaf veiner. You can brush some corn starch onto them to make them less sticky if you need to.
Use the dry leaves individually on cakes, or attach them to a wafer paper “branch.”
To use these leaves, either press them into the cake or onto the cake surface using buttercream as an edible glue. You can also attach them to a wafer paper or spaghetti branch by using wafer paper glue or a little vodka or water, depending on how stiff they are. Using the edible stems will keep everything food-safe on the cake, and avoid the use of wires that will have to be removed from the cake before serving.
Making wafer paper greenery is fairly simple, and is faster than making the leaves from gumpaste. You can make these in advance and use them as needed for an extra pop of green filler in a floral arrangement on a cake.