Toreting a cake isn’t something that most home bakers think to do, but it’s getting more common, and you should definitely do it.
The problem is how to cut the layers evenly, but there are a few ways to make it easier.
This article includes affiliate links that will pay a commission if they’re used to purchase something. As an Amazon associate, I earn from qualifying purchases.
What does torteing a cake mean?
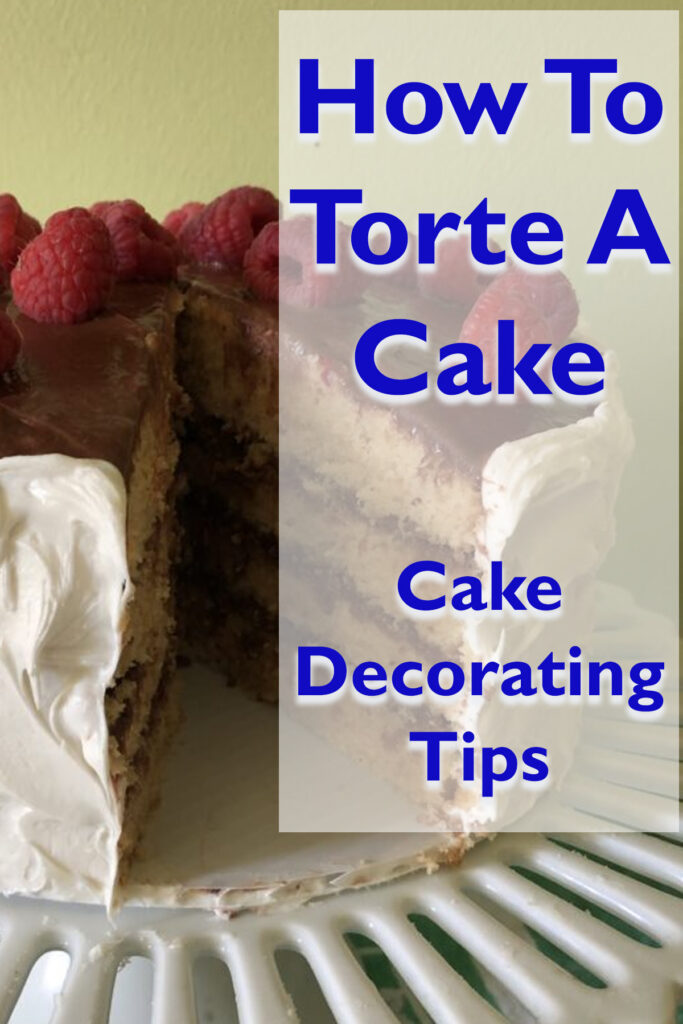
When you torte a cake, you basically just cut the layers in half to make two thinner layers, then you add fillings in between the cut sections as well as between the two layers.
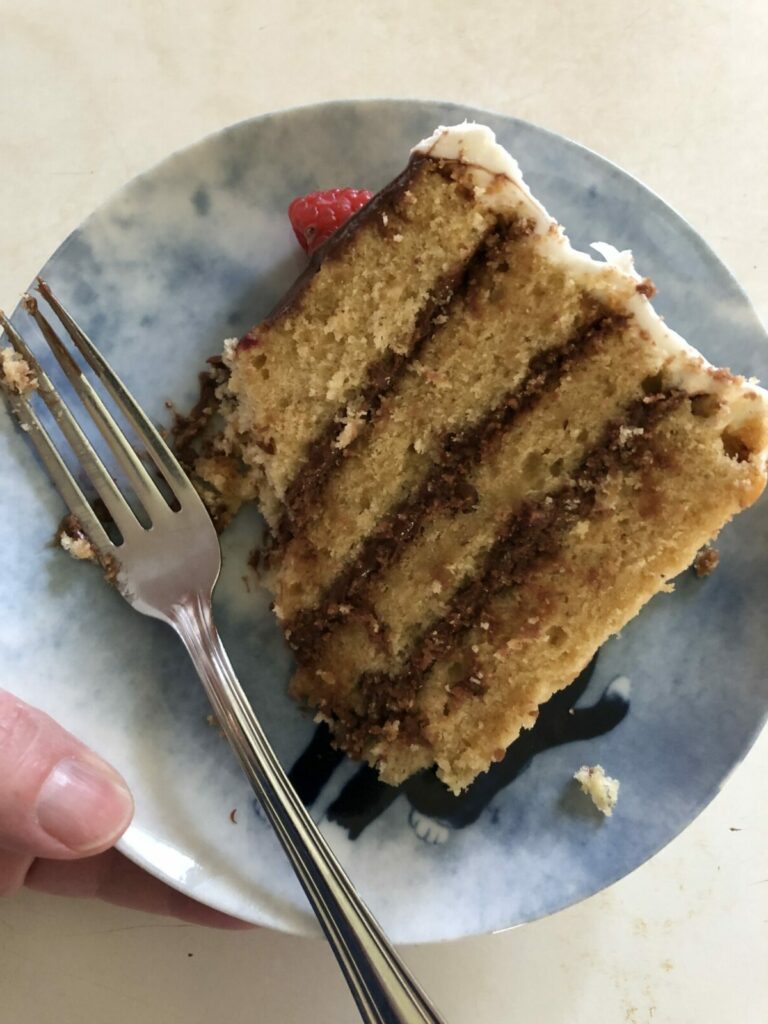
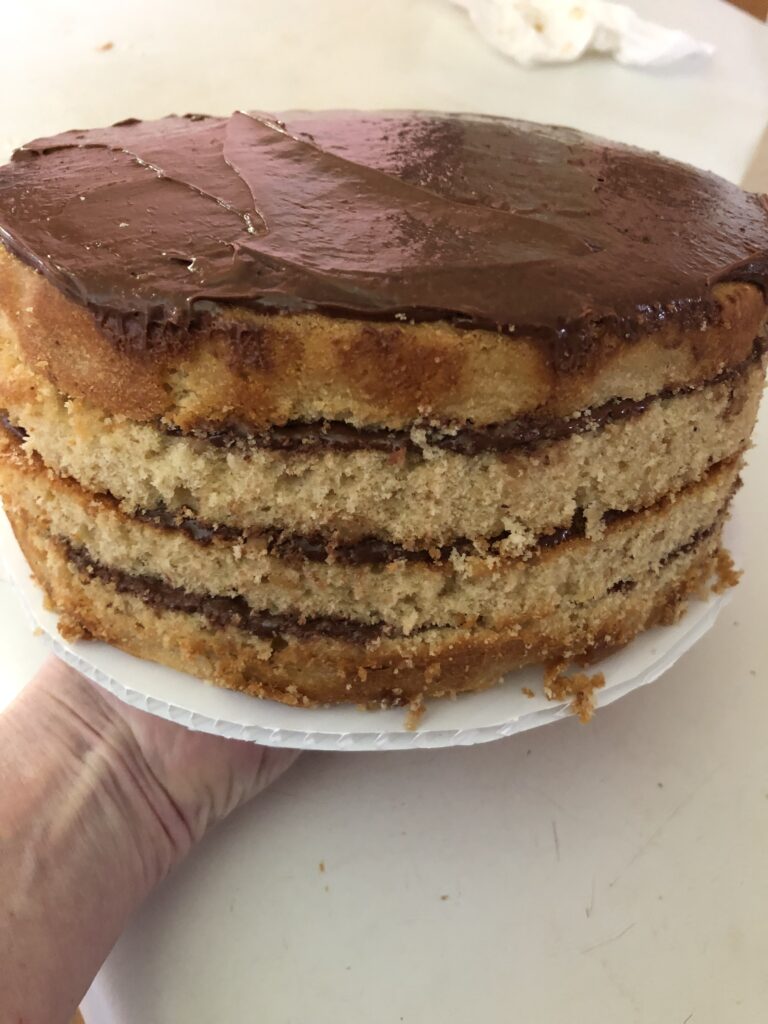
You end up with four thinner layers of cake and three layers of filling instead of two layers of cake with filling in between them.
This makes the cake look fancier, and it also gives you a chance to add soaking syrups and multiple flavors of fillings to the cake if you want to do that.
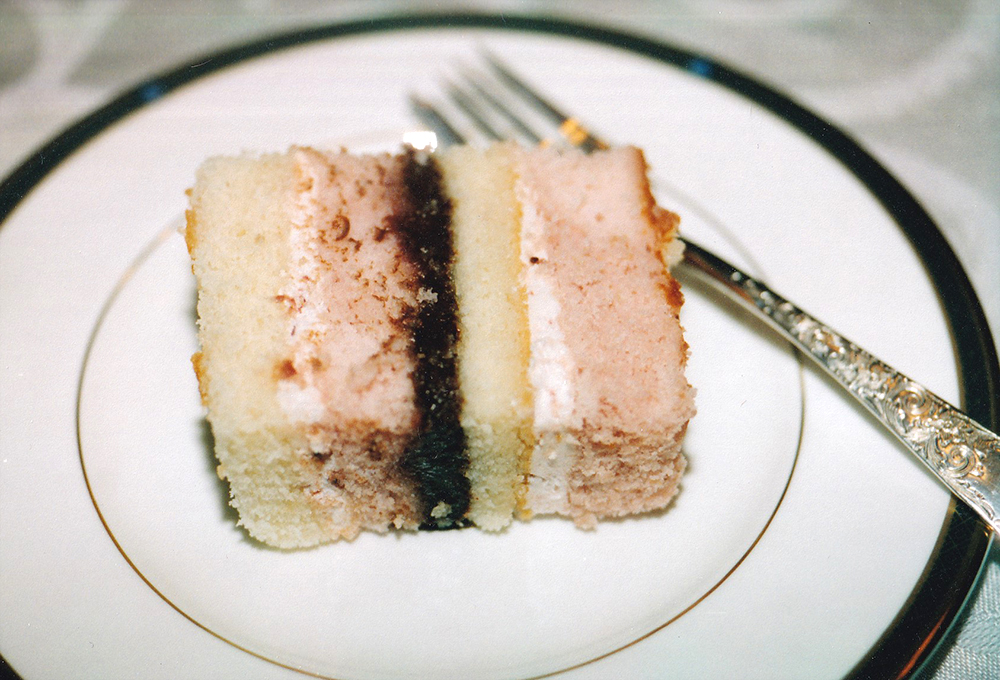
I used to do a lot of torted wedding cakes that had two thin layers of fruit preserves and one layer of a flavored icing. It was a good way to add extra flavor to the cake. (For a list of flavor combinations for vanilla cakes, click here.)
You can also alternate different flavors of cake and fillings to make a pretty design when it’s cut. This cake had alternating strawberry and vanilla cake with chocolate and strawberry filligns.
I mentioned soaking syrups, which is another way to add some additional flavor to the cake layers. Brushing a torted cake layer with a flavored simple syrup can add extra moisture and flavor to a cake and make it really special.
How to torte a cake layer.
The basic idea of torteing a cake layer is to cut it in half evenly. Doing it by eye is one method, but you can end up with one of the layers being a lot thinner than the other if you’re not careful.
DO NOT DO THIS WITH A WARM CAKE! The layer needs to be completely cool to avoid tearing it, since the structure will be firmer when it cools off.
One way to get even halves would be to make a guide all the way around with toothpicks stuck into the cake layer at the same height so that you cut it in half exactly evenly.
The third way would be to use a professional cake leveler, but if you don’t have one of those, a regular serrated bread knife will work.
Some of the cheap levelers that are just a wire will drag through the cake and rip it, so a serrated blade will work better to make a clean cut through the cake.
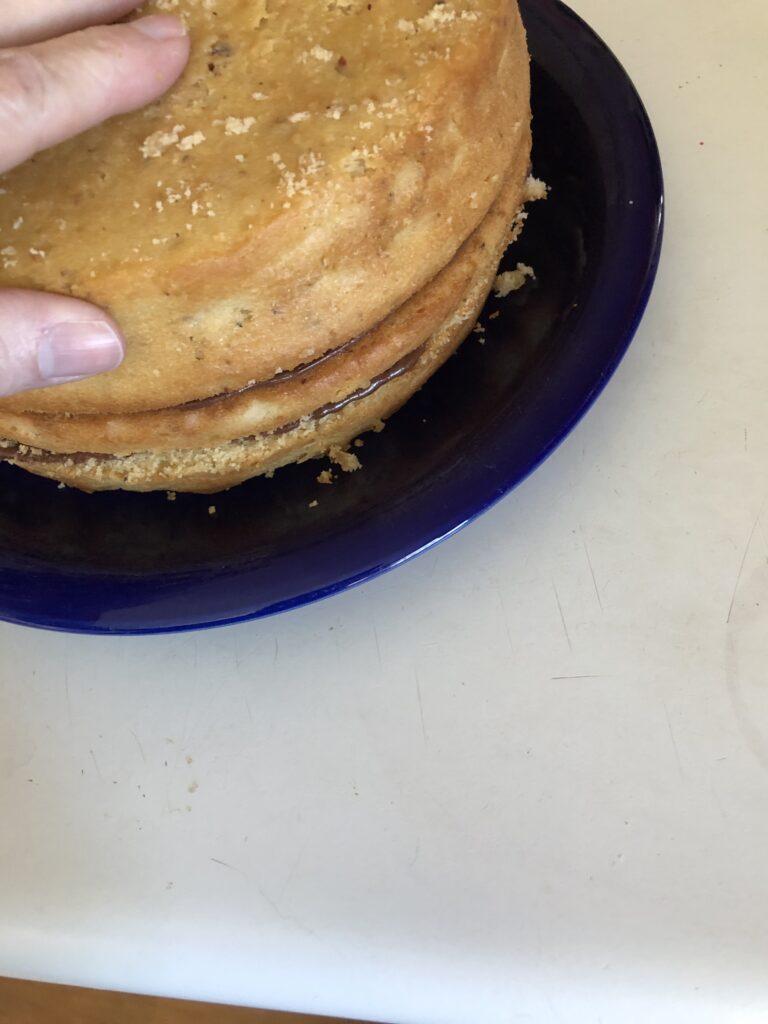
I did this layer by putting it on a plate that had a slight edge to it so that I could use the edge as a guide. As long as the bread knife that I was cutting it with was flat on the edge of the plate, I knew that I was making a cut line at the same height all the way around the cake.
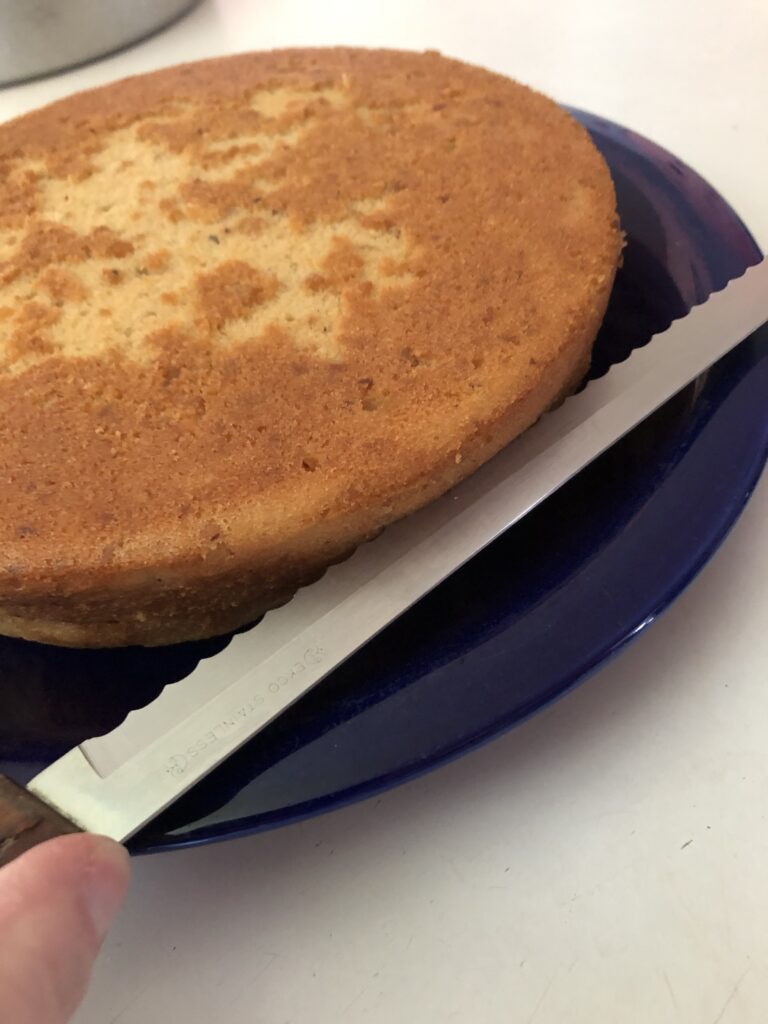
First, I made a shallow cut all the way around the layer to mark where I should be cutting.
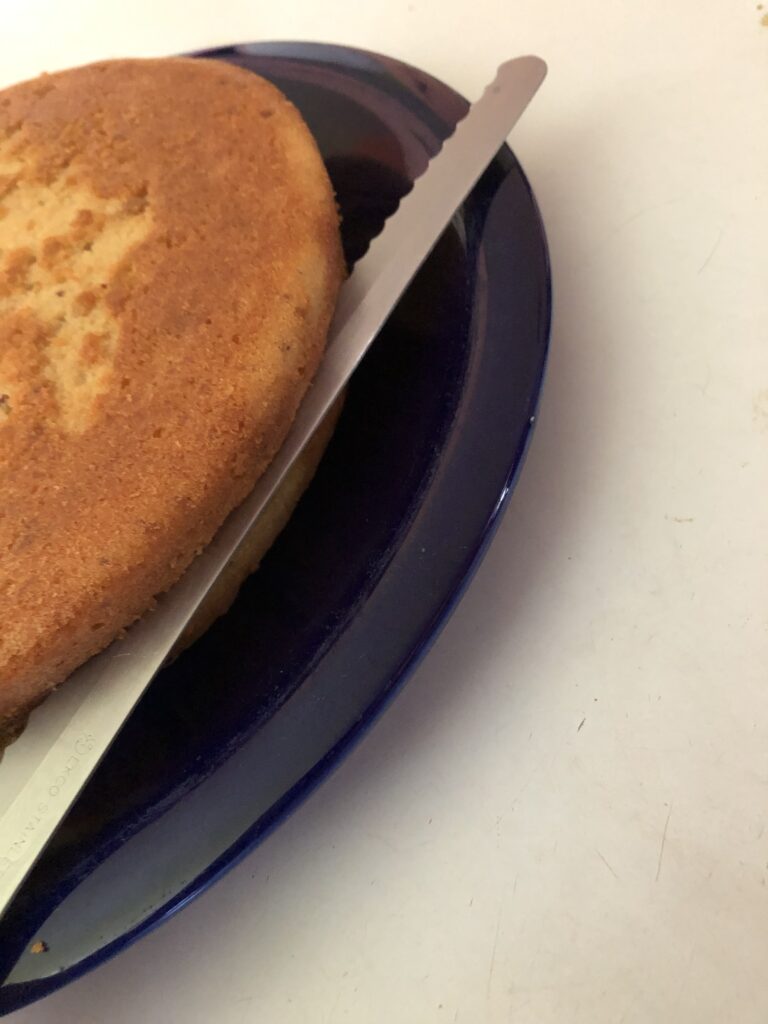
After the line was marked, I started cutting through the layer, using the original cut line as a guide to keep it even.
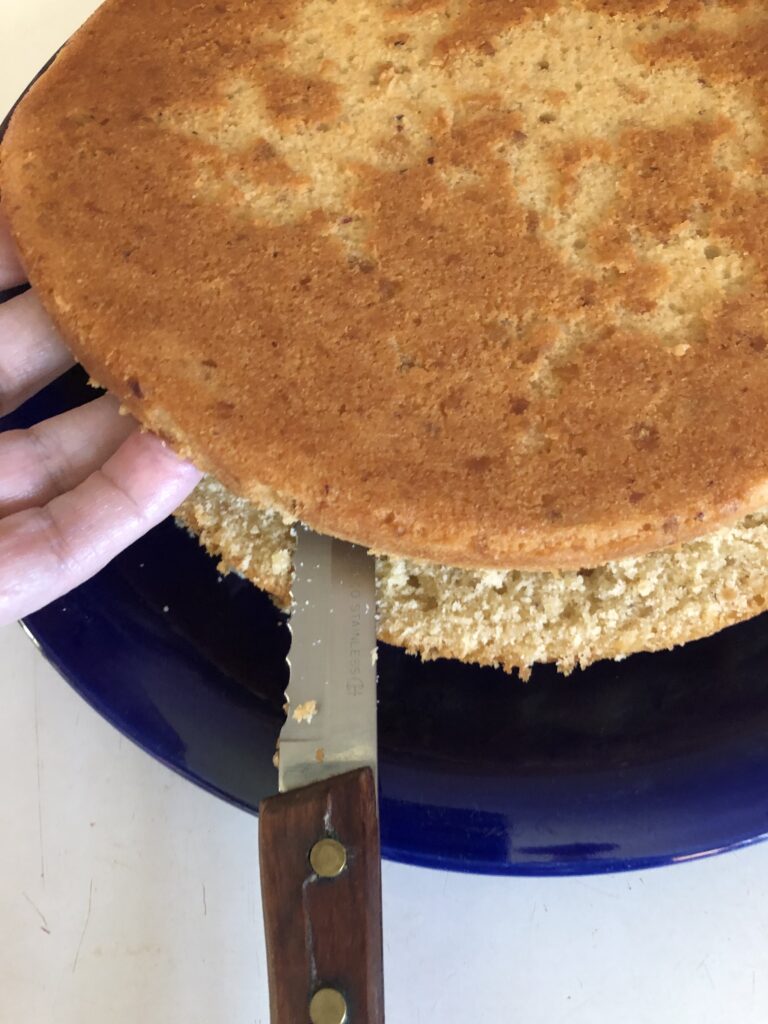
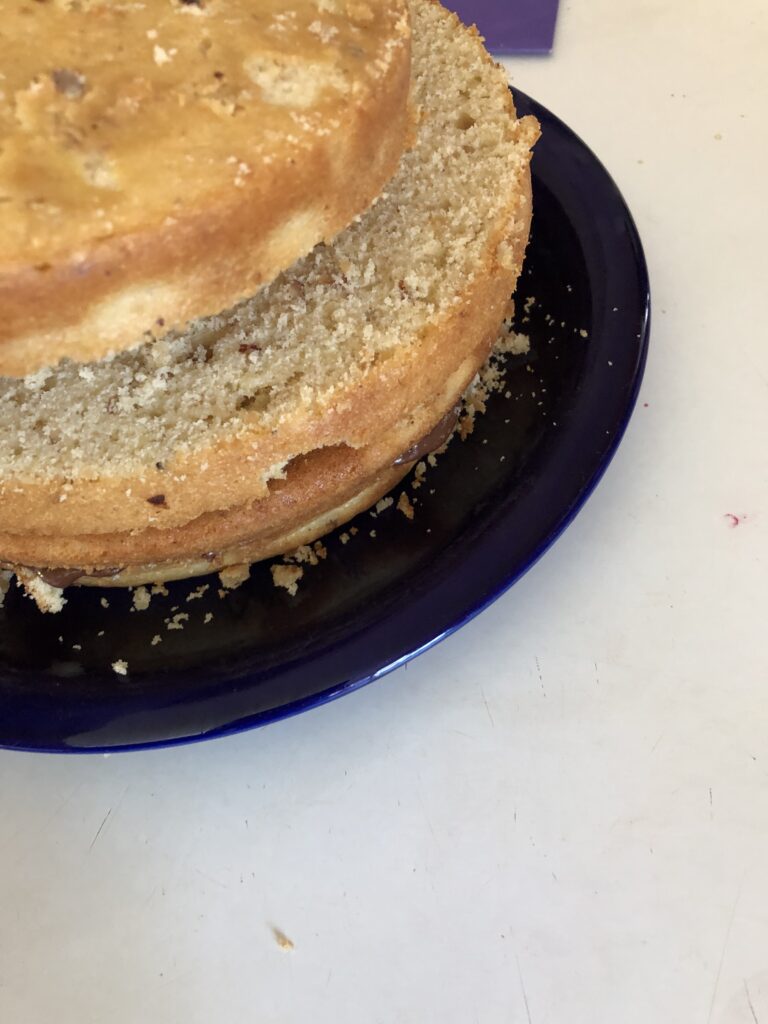
I carefully cut all the way through the layer.
One thing that you might want to do at this point is to put two toothpicks in the layer halves to match them up when you take the top off. That way you’ll be able to see exactly where the halves should be when you replace the cut section after adding the filling.
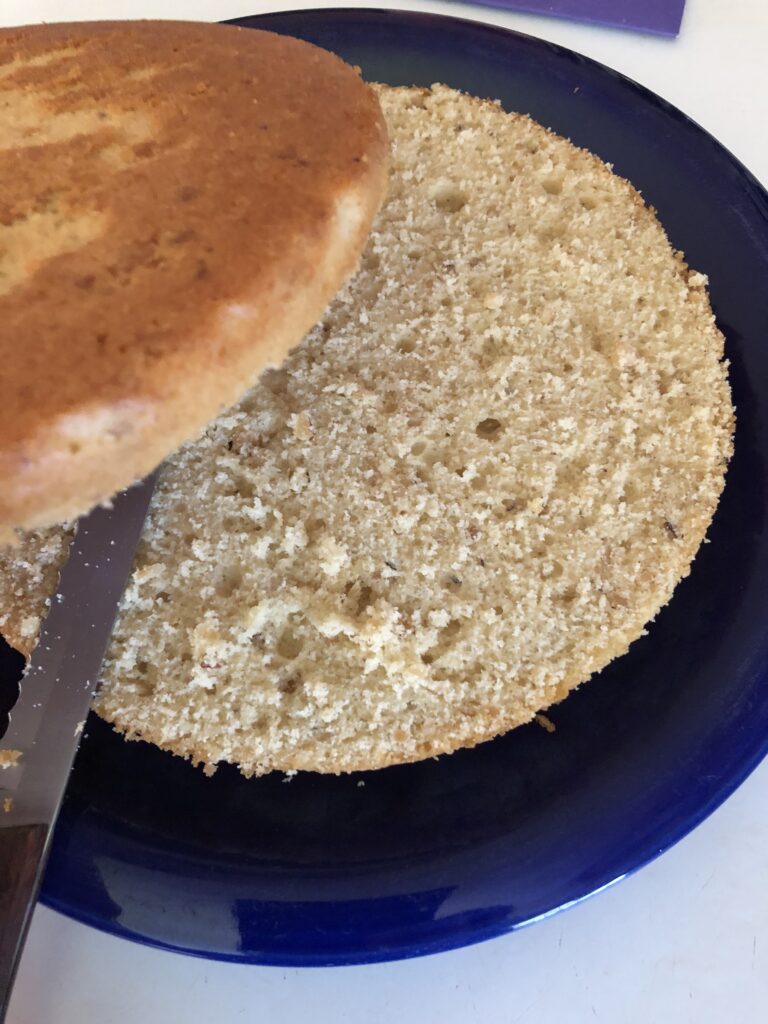
When I was done I was able to remove the top half of the layer and set it aside on a cake board temporarily.
If you used a cake board to begin with, it’ll be easier to move the layer around. You can also use flexible cutting boards that are made from thin plastic to slide in between the cut sections to move them around.
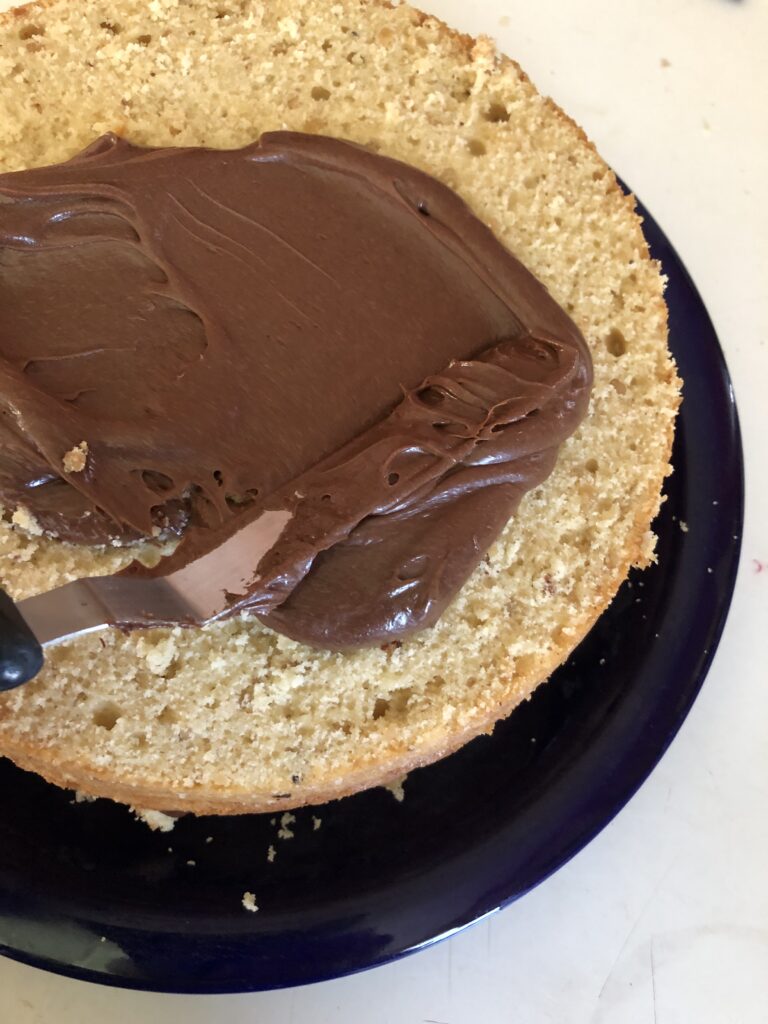
Add the fillings.
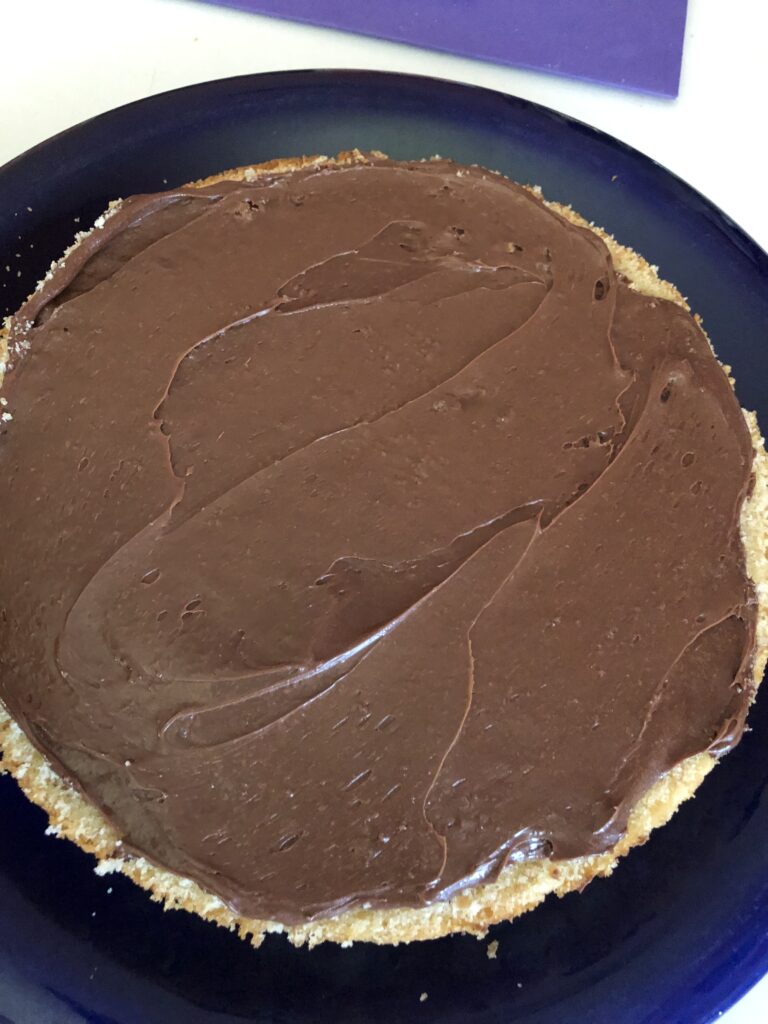
I added some fudge filling to the cut layer. If I was going to add a soaking syrup to the layer I would have done that before adding the filling.
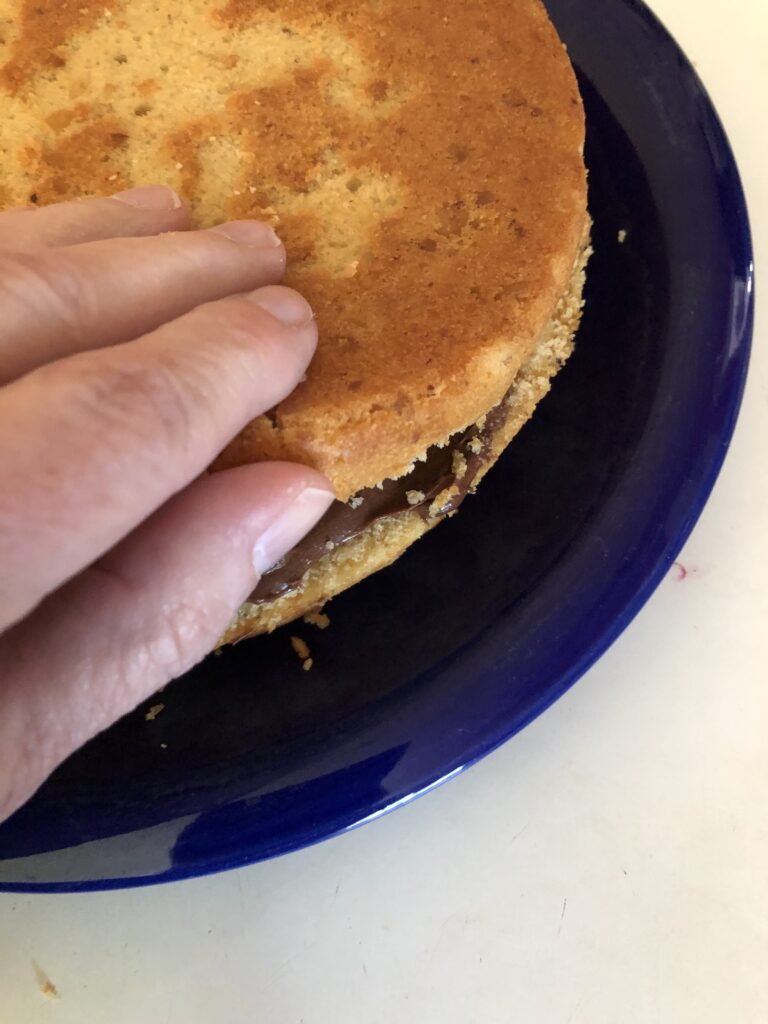
I put the other half of the top layer back on the cake.
If you used the toothpicks to mark the place to line up the cut halves, line them up when you replace the top onto the bottom section.
Add another layer of filling to the top of the bottom layer, and put the top layer on the cake.
Go through the same process of marking the top layer and cutting it in half, then setting the top section aside.
Add another layer of filling to the cut layer, then replace the cut half on top.
Even the tier up.
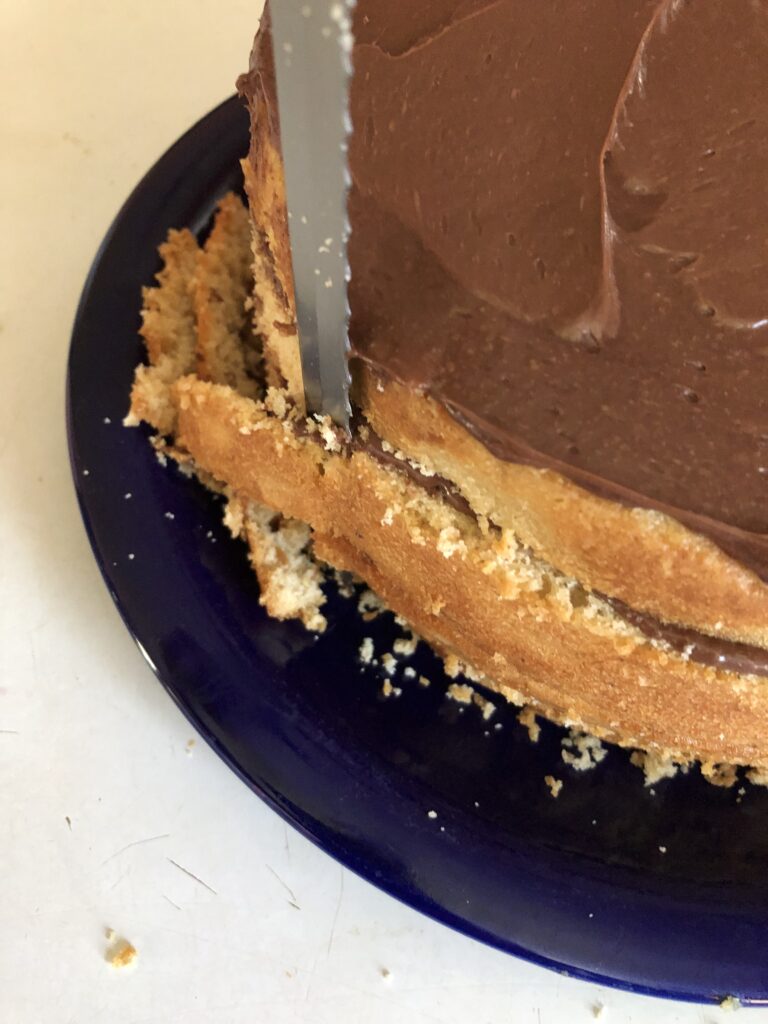
The stacked layers now make up the cake tier. I iced this one with chocolate on the top, but you can wait to do that until the whole thing is evened up and the top of the tier is flat if you need to do that.
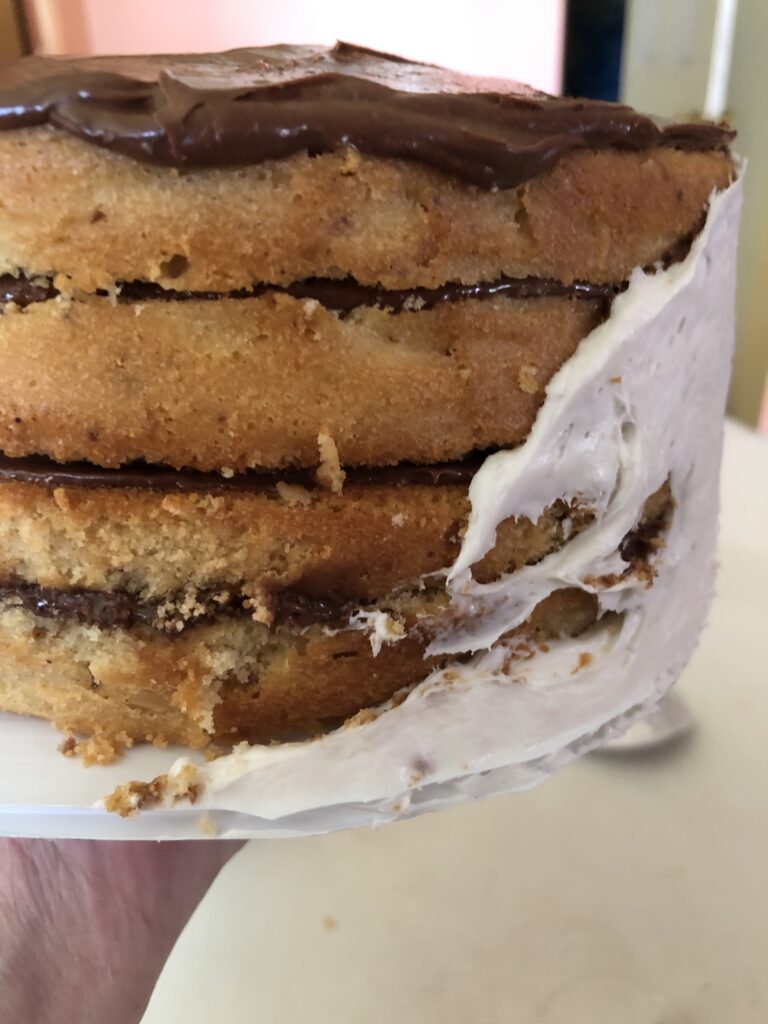
I started doing this on the plate, but it will work better if you use the cake board as a guide! To even up the sides of the stacked layers, trim straight up and down and cut the sides of the cake so that it’s even and there aren’t any bulging sections.
You shouldn’t have to trim off very much, just do the minimum that you need to in order to even up the sides.
If you have the tier on a cake board you can use the bottom edge to trim the cake to size and to add the crumb coat icing.
A crumb coat is important for grabbing onto the loose crumbs on the cake and keepign them from ruining the final icing coat. If your cakes look like they have ton of loose crumbs in them, you probably don’t do a crumb coat, and starting to use one will help your cakes look better.
Add the crumb coat.
To crumb coat the cake, add a thin layer of icing all over it to catch any loose pieces and kind of glue them in place.

Once you have the cake crumb coated, let the icing set up or put it in the fridge for a little while to harden up a bit. Depending on what kind of icing you’re using, it might work better at room temp or cold.
I always do everything at room temperature because it helps to avoid the cake developing a bubble of air under the icing as a cold cake warms up.
It also helps to crumb coat then wait a couple of hours before doing the final icing, because that will give the cake some time to let any air that’s trapped in between layers to make its way out.
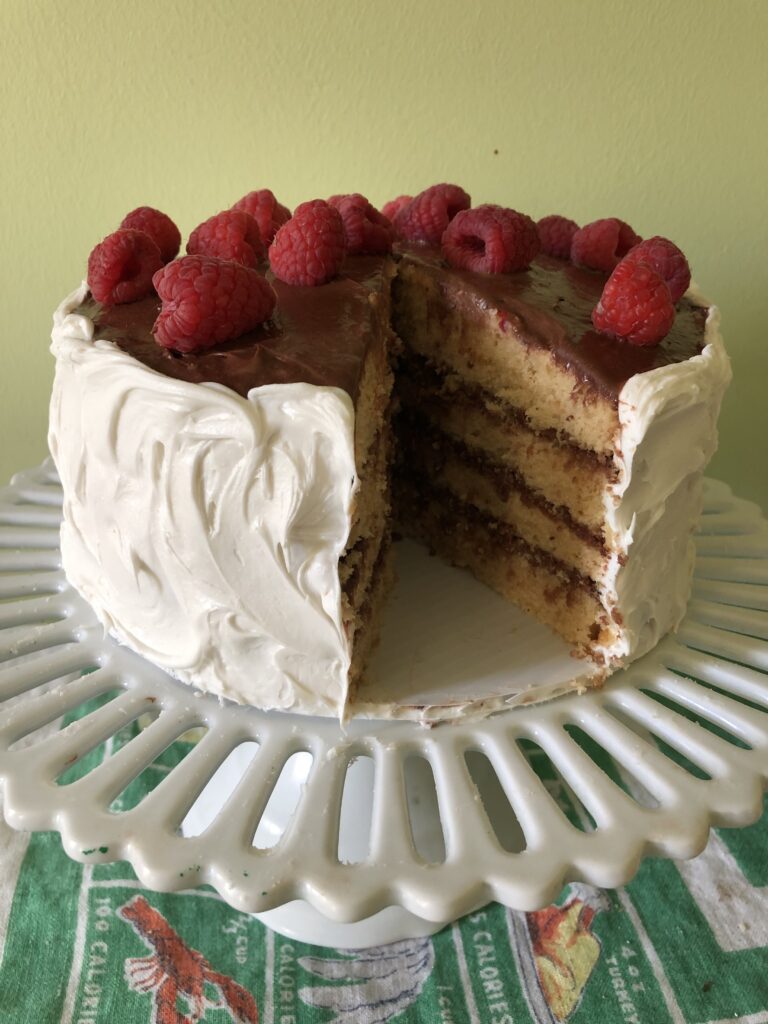
For this cake I did a rustic icing, which is super simple and doesn’t even need to be smoothed out. Add some raspberries on top and this was a fast cake to decorate, and it looks pretty when it’s cut!